使用 Spring Statemachine
参考文档的这一部分介绍了核心功能 Spring Statemachine 提供给任何基于 Spring 的应用程序。
它包括以下主题:
-
Statemachine Configuration 描述了通用配置支持。
-
状态机 ID 描述了机器 ID 的使用。
-
状态机工厂 描述了通用的状态机工厂支持。
-
使用 Scopes 介绍了范围支持。
-
Using Actions 介绍了支持的作。
-
使用 Guards 描述了 Guard 支持。
-
使用扩展状态 介绍了扩展状态支持。
-
用
StateContext描述 State 上下文支持。 -
触发过渡 描述了触发器的使用。
-
侦听状态机事件 介绍了状态机侦听器的使用。
-
上下文集成描述了通用的 Spring 应用程序上下文支持。
-
用
StateMachineAccessor介绍状态机内部访问器支持。 -
用
StateMachineInterceptor介绍状态机错误处理支持。 -
State Machine Security 描述了 state machine security 支持。
-
状态机错误处理描述了状态机拦截器支持。
-
状态机服务描述了状态机服务支持。
-
持久化状态机 描述了状态机持久化支持。
-
Spring Boot Support 描述了 Spring Boot 支持。
-
监视状态机 描述了监视和转换支持。
-
使用分布式状态 介绍了分布式状态机支持。
-
Testing Support 描述了状态机测试支持。
-
Eclipse 建模支持描述了状态机 UML 建模支持。
-
存储库支持 描述了状态机存储库配置支持。
Statemachine 配置
使用状态机时的常见任务之一是设计其 运行时配置。本章重点介绍 Spring Statemachine 的配置以及它如何利用 Spring 的轻量级 IoC 容器简化应用程序内部结构,使其更加 管理。
| 本节中的配置示例功能不完整。那是 您始终需要同时定义 State 和 transition。 否则,状态机配置将格式错误。我们有 通过保留其他需要的部分,简单地使代码片段不那么冗长 外。 |
用enable附注
我们使用两个熟悉的 Spring enabler 注释来简化配置:@EnableStateMachine和@EnableStateMachineFactory.
这些注释在放置在@Configuration类、启用
状态机所需的一些基本功能。
您可以使用@EnableStateMachine当您需要配置来创建
实例StateMachine.通常,@Configuration类扩展适配器
(EnumStateMachineConfigurerAdapter或StateMachineConfigurerAdapter),其中
允许您覆盖配置回调方法。我们自动
检测是否使用这些适配器类并修改运行时配置
逻辑。
您可以使用@EnableStateMachineFactory当您需要配置来创建
实例的StateMachineFactory.
| 以下部分显示了这些用法示例。 |
配置状态
在本指南的后面部分,我们将介绍更复杂的配置示例,但是
我们首先从简单的事情开始。对于大多数简单的状态
machine 中,您可以使用EnumStateMachineConfigurerAdapter并定义
可能的状态,然后选择 Initial (初始) 和 Optional End (可选结束状态)。
@Configuration
@EnableStateMachine
public class Config1Enums
		extends EnumStateMachineConfigurerAdapter<States, Events> {

	@Override
	public void configure(StateMachineStateConfigurer<States, Events> states)
			throws Exception {
		states
			.withStates()
				.initial(States.S1)
				.end(States.SF)
				.states(EnumSet.allOf(States.class));
	}

}
您还可以使用字符串而不是枚举作为状态和
事件StateMachineConfigurerAdapter,如下例所示。最
的配置示例 ues 枚举,但是,一般来说,
您可以交换字符串和枚举。
@Configuration
@EnableStateMachine
public class Config1Strings
		extends StateMachineConfigurerAdapter<String, String> {

	@Override
	public void configure(StateMachineStateConfigurer<String, String> states)
			throws Exception {
		states
			.withStates()
				.initial("S1")
				.end("SF")
				.states(new HashSet<String>(Arrays.asList("S1","S2","S3","S4")));
	}

}
| 使用枚举会带来一组更安全的状态和事件类型,但 将可能的组合限制为编译时。字符串没有 this 限制,并允许使用更动态的方式来构建状态 机器配置,但不允许相同级别的安全。 |
配置分层状态
您可以使用多个withStates()调用,您可以在其中使用parent()以指示这些
特定状态是其他状态的子状态。
以下示例显示了如何执行此作:
@Configuration
@EnableStateMachine
public class Config2
		extends EnumStateMachineConfigurerAdapter<States, Events> {

	@Override
	public void configure(StateMachineStateConfigurer<States, Events> states)
			throws Exception {
		states
			.withStates()
				.initial(States.S1)
				.state(States.S1)
				.and()
				.withStates()
					.parent(States.S1)
					.initial(States.S2)
					.state(States.S2);
	}

}
配置区域
没有特殊的配置方法可以标记 states 作为正交 state 的一部分。简单来说,正交 当同一分层状态机具有多个 set 时创建 state 的状态,每个状态都有一个初始状态。因为单个状态 machine 只能有一个初始状态,多个初始状态必须 表示一个特定的 state 必须有多个独立的 Region。 以下示例显示如何定义区域:
@Configuration
@EnableStateMachine
public class Config10
		extends EnumStateMachineConfigurerAdapter<States2, Events> {

	@Override
	public void configure(StateMachineStateConfigurer<States2, Events> states)
			throws Exception {
		states
			.withStates()
				.initial(States2.S1)
				.state(States2.S2)
				.and()
				.withStates()
					.parent(States2.S2)
					.initial(States2.S2I)
					.state(States2.S21)
					.end(States2.S2F)
					.and()
				.withStates()
					.parent(States2.S2)
					.initial(States2.S3I)
					.state(States2.S31)
					.end(States2.S3F);
	}

}
当保留具有区域或通常
依靠任何功能来重置计算机,您可能需要
拥有区域的专用 ID。默认情况下,此 ID
是生成的 UUID。如下例所示,StateConfigurer具有
一个名为region(String id),用于设置区域的 ID:
@Configuration
@EnableStateMachine
public class Config10RegionId
		extends EnumStateMachineConfigurerAdapter<States2, Events> {

	@Override
	public void configure(StateMachineStateConfigurer<States2, Events> states)
			throws Exception {
		states
			.withStates()
				.initial(States2.S1)
				.state(States2.S2)
				.and()
				.withStates()
					.parent(States2.S2)
					.region("R1")
					.initial(States2.S2I)
					.state(States2.S21)
					.end(States2.S2F)
					.and()
				.withStates()
					.parent(States2.S2)
					.region("R2")
					.initial(States2.S3I)
					.state(States2.S31)
					.end(States2.S3F);
	}

}
配置过渡
我们支持三种不同类型的过渡:external,internal和local.转换由 signal 触发
(这是发送到状态机的事件)或定时器。
以下示例显示如何定义所有三种类型的过渡:
@Configuration
@EnableStateMachine
public class Config3
		extends EnumStateMachineConfigurerAdapter<States, Events> {

	@Override
	public void configure(StateMachineStateConfigurer<States, Events> states)
			throws Exception {
		states
			.withStates()
				.initial(States.S1)
				.states(EnumSet.allOf(States.class));
	}

	@Override
	public void configure(StateMachineTransitionConfigurer<States, Events> transitions)
			throws Exception {
		transitions
			.withExternal()
				.source(States.S1).target(States.S2)
				.event(Events.E1)
				.and()
			.withInternal()
				.source(States.S2)
				.event(Events.E2)
				.and()
			.withLocal()
				.source(States.S2).target(States.S3)
				.event(Events.E3);
	}

}
配置 Guard
你可以使用 guard 来保护 state transitions。您可以使用Guard接口
执行方法可以访问StateContext.
以下示例显示了如何执行此作:
@Configuration
@EnableStateMachine
public class Config4
		extends EnumStateMachineConfigurerAdapter<States, Events> {

	@Override
	public void configure(StateMachineTransitionConfigurer<States, Events> transitions)
			throws Exception {
		transitions
			.withExternal()
				.source(States.S1).target(States.S2)
				.event(Events.E1)
				.guard(guard())
				.and()
			.withExternal()
				.source(States.S2).target(States.S3)
				.event(Events.E2)
				.guardExpression("true");

	}

	@Bean
	public Guard<States, Events> guard() {
		return new Guard<States, Events>() {

			@Override
			public boolean evaluate(StateContext<States, Events> context) {
				return true;
			}
		};
	}

}
在前面的示例中,我们使用了两种不同类型的 guard 配置。首先,我们
创建了一个简单的Guard作为 Bean 并将其附加到
国家S1和S2.
其次,我们使用 SPeL 表达式作为守卫来表示
expression 必须返回一个BOOLEAN价值。在幕后,这个
基于表达式的守卫是一个SpelExpressionGuard.我们将其附加到
状态之间的转换S2和S3.两个守卫
始终评估为true.
配置作
您可以定义要使用过渡和状态执行的作。 作始终作为 源自触发器。以下示例说明如何定义作:
@Configuration
@EnableStateMachine
public class Config51
		extends EnumStateMachineConfigurerAdapter<States, Events> {

	@Override
	public void configure(StateMachineTransitionConfigurer<States, Events> transitions)
			throws Exception {
		transitions
			.withExternal()
				.source(States.S1)
				.target(States.S2)
				.event(Events.E1)
				.action(action());
	}

	@Bean
	public Action<States, Events> action() {
		return new Action<States, Events>() {

			@Override
			public void execute(StateContext<States, Events> context) {
				// do something
			}
		};
	}

}
在前面的示例中,单个Action被定义为名为action和关联
从S1自S2.
以下示例演示如何多次使用作:
@Configuration
@EnableStateMachine
public class Config52
		extends EnumStateMachineConfigurerAdapter<States, Events> {

	@Override
	public void configure(StateMachineStateConfigurer<States, Events> states)
			throws Exception {
		states
			.withStates()
				.initial(States.S1, action())
				.state(States.S1, action(), null)
				.state(States.S2, null, action())
				.state(States.S2, action())
				.state(States.S3, action(), action());
	}

	@Bean
	public Action<States, Events> action() {
		return new Action<States, Events>() {

			@Override
			public void execute(StateContext<States, Events> context) {
				// do something
			}
		};
	}

}
通常,您不会定义相同的Actioninstance for different
阶段,但我们在这里这样做是为了避免在代码中产生太多干扰
片段。 |
在前面的示例中,单个Action由名为action和关联
与状态S1,S2和S3.我们需要澄清一下这里发生了什么:
-
我们为初始状态 (initial state) 定义了一个 action
S1. -
我们为 state 定义了一个 entry action
S1并将 Exit作留空。 -
我们为 state 定义了一个 exit action
S2并将 entry作留空。 -
我们为 state 定义了一个 state action
S2. -
我们为 state 定义了 entry 和 exit 动作
S3. -
请注意,状态
S1与initial()和state()功能。仅当您想要定义 entry 或 exit 时,才需要执行此作 具有初始状态的 action。
定义作initial()函数仅运行一个特定的
action 来触发。此作
是仅运行一次的初始化作。定义的作
跟state()如果状态机转换回来,则运行
以及 forward 在初始状态和非初始状态之间。 |
状态作
与 entry 和 exit 相比,状态作的运行方式不同 作,因为执行发生在进入状态之后 如果 state exit 发生在特定作之前,则可以取消 已完成。
State action 使用正常的响应式 flow 执行,方法是订阅
reactor 的默认并行调度器。这意味着,无论您在
action 中,您需要能够捕获InterruptedException或者,更广泛地说,
定期检查是否Thread被打断。
以下示例显示了使用 defaultIMMEDIATE_CANCEL哪
当 state 为 complete 时,将立即取消正在运行的任务:
@Configuration
@EnableStateMachine
static class Config1 extends StateMachineConfigurerAdapter<String, String> {

	@Override
	public void configure(StateMachineConfigurationConfigurer<String, String> config) throws Exception {
		config
			.withConfiguration()
				.stateDoActionPolicy(StateDoActionPolicy.IMMEDIATE_CANCEL);
	}

	@Override
	public void configure(StateMachineStateConfigurer<String, String> states) throws Exception {
		states
			.withStates()
				.initial("S1")
				.state("S2", context -> {})
				.state("S3");
	}

	@Override
	public void configure(StateMachineTransitionConfigurer<String, String> transitions) throws Exception {
		transitions
			.withExternal()
				.source("S1")
				.target("S2")
				.event("E1")
				.and()
			.withExternal()
				.source("S2")
				.target("S3")
				.event("E2");
	}
}
您可以将策略设置为TIMEOUT_CANCEL与全局超时一起
对于每台计算机。这会将状态行为更改为 await action completion
在请求取消之前。以下示例显示了如何执行此作:
@Override
public void configure(StateMachineConfigurationConfigurer<String, String> config) throws Exception {
	config
		.withConfiguration()
			.stateDoActionPolicy(StateDoActionPolicy.TIMEOUT_CANCEL)
			.stateDoActionPolicyTimeout(10, TimeUnit.SECONDS);
}
如果Event直接将机器带入一个状态,以便事件标头
可用于特定作,您还可以使用专用的
event 标头来设置特定的超时时间(在millis).
您可以使用保留的标头值StateMachineMessageHeaders.HEADER_DO_ACTION_TIMEOUT为此目的。以下示例显示了如何执行此作:
@Autowired
StateMachine<String, String> stateMachine;

void sendEventUsingTimeout() {
	stateMachine
		.sendEvent(Mono.just(MessageBuilder
			.withPayload("E1")
			.setHeader(StateMachineMessageHeaders.HEADER_DO_ACTION_TIMEOUT, 5000)
			.build()))
		.subscribe();

}
转换作错误处理
您始终可以手动捕获异常。但是,使用
transitions,您可以定义一个 error作,该作在
异常。然后,可以从StateContext传递给该作。以下示例演示如何创建 state
处理异常:
@Configuration
@EnableStateMachine
public class Config53
		extends EnumStateMachineConfigurerAdapter<States, Events> {

	@Override
	public void configure(StateMachineTransitionConfigurer<States, Events> transitions)
			throws Exception {
		transitions
			.withExternal()
				.source(States.S1)
				.target(States.S2)
				.event(Events.E1)
				.action(action(), errorAction());
	}

	@Bean
	public Action<States, Events> action() {
		return new Action<States, Events>() {

			@Override
			public void execute(StateContext<States, Events> context) {
				throw new RuntimeException("MyError");
			}
		};
	}

	@Bean
	public Action<States, Events> errorAction() {
		return new Action<States, Events>() {

			@Override
			public void execute(StateContext<States, Events> context) {
				// RuntimeException("MyError") added to context
				Exception exception = context.getException();
				exception.getMessage();
			}
		};
	}

}
如果需要,您可以为每个作手动创建类似的 logic。 以下示例显示了如何执行此作:
@Override
public void configure(StateMachineTransitionConfigurer<States, Events> transitions)
		throws Exception {
	transitions
		.withExternal()
			.source(States.S1)
			.target(States.S2)
			.event(Events.E1)
			.action(Actions.errorCallingAction(action(), errorAction()));
}
状态作错误处理
还提供类似于处理 state 转换中错误的 logic 的 logic 用于进入状态和退出状态。
对于这些情况,StateConfigurer具有调用stateEntry,stateDo和stateExit.这些方法定义了一个erroraction 与 normal (non-error) 一起作action.
以下示例演示如何使用所有三种方法:
@Configuration
@EnableStateMachine
public class Config55
		extends EnumStateMachineConfigurerAdapter<States, Events> {

	@Override
	public void configure(StateMachineStateConfigurer<States, Events> states)
			throws Exception {
		states
			.withStates()
				.initial(States.S1)
				.stateEntry(States.S2, action(), errorAction())
				.stateDo(States.S2, action(), errorAction())
				.stateExit(States.S2, action(), errorAction())
				.state(States.S3);
	}

	@Bean
	public Action<States, Events> action() {
		return new Action<States, Events>() {

			@Override
			public void execute(StateContext<States, Events> context) {
				throw new RuntimeException("MyError");
			}
		};
	}

	@Bean
	public Action<States, Events> errorAction() {
		return new Action<States, Events>() {

			@Override
			public void execute(StateContext<States, Events> context) {
				// RuntimeException("MyError") added to context
				Exception exception = context.getException();
				exception.getMessage();
			}
		};
	}
}
配置伪状态
伪 state 配置通常是通过配置 state 和 转换。伪状态会自动作为 国家。
初始状态
您可以使用initial()方法。例如,此初始作适用于初始化
扩展状态变量。以下示例演示如何使用initial()方法:
@Configuration
@EnableStateMachine
public class Config11
		extends EnumStateMachineConfigurerAdapter<States, Events> {

	@Override
	public void configure(StateMachineStateConfigurer<States, Events> states)
			throws Exception {
		states
			.withStates()
				.initial(States.S1, initialAction())
				.end(States.SF)
				.states(EnumSet.allOf(States.class));
	}

	@Bean
	public Action<States, Events> initialAction() {
		return new Action<States, Events>() {

			@Override
			public void execute(StateContext<States, Events> context) {
				// do something initially
			}
		};
	}

}
终止状态
您可以使用end()方法。
您最多可以为每个子计算机或区域执行此作一次。
以下示例演示如何使用end()方法:
@Configuration
@EnableStateMachine
public class Config1Enums
		extends EnumStateMachineConfigurerAdapter<States, Events> {

	@Override
	public void configure(StateMachineStateConfigurer<States, Events> states)
			throws Exception {
		states
			.withStates()
				.initial(States.S1)
				.end(States.SF)
				.states(EnumSet.allOf(States.class));
	}

}
状态历史
您可以为每个单独的状态机定义一次状态历史记录。
您需要选择其状态标识符并设置History.SHALLOW或History.DEEP.以下示例使用History.SHALLOW:
@Configuration
@EnableStateMachine
public class Config12
		extends EnumStateMachineConfigurerAdapter<States3, Events> {

	@Override
	public void configure(StateMachineStateConfigurer<States3, Events> states)
			throws Exception {
		states
			.withStates()
				.initial(States3.S1)
				.state(States3.S2)
				.and()
				.withStates()
					.parent(States3.S2)
					.initial(States3.S2I)
					.state(States3.S21)
					.state(States3.S22)
					.history(States3.SH, History.SHALLOW);
	}

	@Override
	public void configure(StateMachineTransitionConfigurer<States3, Events> transitions)
			throws Exception {
		transitions
			.withHistory()
				.source(States3.SH)
				.target(States3.S22);
	}

}
此外,如前面的示例所示,您可以选择定义默认的 在同一台机器中从历史状态过渡到状态顶点。 此过渡是默认进行的,例如,如果计算机具有 从未被输入,因此,将没有历史记录可用。如果默认的 state transition 未定义,则正常进入 Region 为 做。如果计算机的历史记录为 最终状态。
选择状态
需要在 state 和 transition to work 中定义 choice
适当地。您可以使用choice()方法。当转换
配置。
您可以使用withChoice(),您可以在其中定义源
state 和first/then/last结构,它相当于 Normalif/elseif/else.跟first和then,你可以指定一个守卫
就像您将if/elseif第。
过渡需要能够存在,因此您必须确保使用last.
否则,配置格式不正确。以下示例显示了如何定义
a choice 状态:
@Configuration
@EnableStateMachine
public class Config13
		extends EnumStateMachineConfigurerAdapter<States, Events> {

	@Override
	public void configure(StateMachineStateConfigurer<States, Events> states)
			throws Exception {
		states
			.withStates()
				.initial(States.SI)
				.choice(States.S1)
				.end(States.SF)
				.states(EnumSet.allOf(States.class));
	}

	@Override
	public void configure(StateMachineTransitionConfigurer<States, Events> transitions)
			throws Exception {
		transitions
			.withChoice()
				.source(States.S1)
				.first(States.S2, s2Guard())
				.then(States.S3, s3Guard())
				.last(States.S4);
	}

	@Bean
	public Guard<States, Events> s2Guard() {
		return new Guard<States, Events>() {

			@Override
			public boolean evaluate(StateContext<States, Events> context) {
				return false;
			}
		};
	}

	@Bean
	public Guard<States, Events> s3Guard() {
		return new Guard<States, Events>() {

			@Override
			public boolean evaluate(StateContext<States, Events> context) {
				return true;
			}
		};
	}

}
作可以在 Nm 的传入和传出过渡 choice 伪状态。如以下示例所示,一个虚拟 lambda action 的 API API 的 API 的 Lambda作(其中它还 定义一个 error作):
@Configuration
@EnableStateMachine
public class Config23
		extends EnumStateMachineConfigurerAdapter<States, Events> {

	@Override
	public void configure(StateMachineStateConfigurer<States, Events> states)
			throws Exception {
		states
			.withStates()
				.initial(States.SI)
				.choice(States.S1)
				.end(States.SF)
				.states(EnumSet.allOf(States.class));
	}

	@Override
	public void configure(StateMachineTransitionConfigurer<States, Events> transitions)
			throws Exception {
		transitions
			.withExternal()
				.source(States.SI)
				.action(c -> {
						// action with SI-S1
					})
				.target(States.S1)
				.and()
			.withChoice()
				.source(States.S1)
				.first(States.S2, c -> {
						return true;
					})
				.last(States.S3, c -> {
						// action with S1-S3
					}, c -> {
						// error callback for action S1-S3
					});
	}
}
| Junction 具有相同的 api 格式,这意味着可以定义作 同样地。 |
交汇点状态
您需要在状态和转换中定义一个 junction 才能使其正常工作
适当地。您可以使用junction()方法。当转换
配置。
您可以使用withJunction()定义源的位置
state 和first/then/last结构体(相当于普通的if/elseif/else).跟first和then,您可以将守卫指定为
您将使用 Condition 和if/elseif第。
过渡需要能够存在,因此您必须确保使用last.
否则,配置格式不正确。
以下示例使用联结:
@Configuration
@EnableStateMachine
public class Config20
		extends EnumStateMachineConfigurerAdapter<States, Events> {

	@Override
	public void configure(StateMachineStateConfigurer<States, Events> states)
			throws Exception {
		states
			.withStates()
				.initial(States.SI)
				.junction(States.S1)
				.end(States.SF)
				.states(EnumSet.allOf(States.class));
	}

	@Override
	public void configure(StateMachineTransitionConfigurer<States, Events> transitions)
			throws Exception {
		transitions
			.withJunction()
				.source(States.S1)
				.first(States.S2, s2Guard())
				.then(States.S3, s3Guard())
				.last(States.S4);
	}

	@Bean
	public Guard<States, Events> s2Guard() {
		return new Guard<States, Events>() {

			@Override
			public boolean evaluate(StateContext<States, Events> context) {
				return false;
			}
		};
	}

	@Bean
	public Guard<States, Events> s3Guard() {
		return new Guard<States, Events>() {

			@Override
			public boolean evaluate(StateContext<States, Events> context) {
				return true;
			}
		};
	}

}
选择和交汇点之间的区别纯粹是学术性的,因为两者都是
实现方式first/then/last结构。然而,从理论上讲,基于
在 UML 建模上,choice只允许一个传入过渡,而junction允许多个传入过渡。在代码级别,
功能几乎相同。 |
分叉状态
您必须在 state 和 transitions 中定义 fork 才能正常工作
适当地。您可以使用fork()方法。当转换
配置。
目标状态需要是 super 状态或 immediate 状态中的 地区。使用超级状态作为目标会将所有区域置于 初始状态。以单个状态为目标,入口控制更严格 到区域。以下示例使用 fork:
@Configuration
@EnableStateMachine
public class Config14
		extends EnumStateMachineConfigurerAdapter<States2, Events> {

	@Override
	public void configure(StateMachineStateConfigurer<States2, Events> states)
			throws Exception {
		states
			.withStates()
				.initial(States2.S1)
				.fork(States2.S2)
				.state(States2.S3)
				.and()
				.withStates()
					.parent(States2.S3)
					.initial(States2.S2I)
					.state(States2.S21)
					.state(States2.S22)
					.end(States2.S2F)
					.and()
				.withStates()
					.parent(States2.S3)
					.initial(States2.S3I)
					.state(States2.S31)
					.state(States2.S32)
					.end(States2.S3F);
	}

	@Override
	public void configure(StateMachineTransitionConfigurer<States2, Events> transitions)
			throws Exception {
		transitions
			.withFork()
				.source(States2.S2)
				.target(States2.S22)
				.target(States2.S32);
	}

}
加入状态
您必须在 state 和 transition 中定义一个 join 才能正常工作
适当地。您可以使用join()方法。此状态不需要匹配源状态或
target 状态。
您可以选择当所有源状态时转换转到的目标状态 已加入。如果您使用 State Hosting Regions 作为源,则 区域的状态用作联接。否则,您可以选择任何 州。以下示例使用 join:
@Configuration
@EnableStateMachine
public class Config15
		extends EnumStateMachineConfigurerAdapter<States2, Events> {

	@Override
	public void configure(StateMachineStateConfigurer<States2, Events> states)
			throws Exception {
		states
			.withStates()
				.initial(States2.S1)
				.state(States2.S3)
				.join(States2.S4)
				.state(States2.S5)
				.and()
				.withStates()
					.parent(States2.S3)
					.initial(States2.S2I)
					.state(States2.S21)
					.state(States2.S22)
					.end(States2.S2F)
					.and()
				.withStates()
					.parent(States2.S3)
					.initial(States2.S3I)
					.state(States2.S31)
					.state(States2.S32)
					.end(States2.S3F);
	}

	@Override
	public void configure(StateMachineTransitionConfigurer<States2, Events> transitions)
			throws Exception {
		transitions
			.withJoin()
				.source(States2.S2F)
				.source(States2.S3F)
				.target(States2.S4)
				.and()
			.withExternal()
				.source(States2.S4)
				.target(States2.S5);
	}
}
您还可以让多个过渡源自
join 状态。在这种情况下,我们建议你使用 guard 并定义你的 guard
使得只有一个守卫计算为TRUE在任何给定时间。否则
过渡行为是不可预测的。这在以下示例中显示,其中 guard
检查 extended state 是否有变量:
@Configuration
@EnableStateMachine
public class Config22
		extends EnumStateMachineConfigurerAdapter<States2, Events> {

	@Override
	public void configure(StateMachineStateConfigurer<States2, Events> states)
			throws Exception {
		states
			.withStates()
				.initial(States2.S1)
				.state(States2.S3)
				.join(States2.S4)
				.state(States2.S5)
				.end(States2.SF)
				.and()
				.withStates()
					.parent(States2.S3)
					.initial(States2.S2I)
					.state(States2.S21)
					.state(States2.S22)
					.end(States2.S2F)
					.and()
				.withStates()
					.parent(States2.S3)
					.initial(States2.S3I)
					.state(States2.S31)
					.state(States2.S32)
					.end(States2.S3F);
	}

	@Override
	public void configure(StateMachineTransitionConfigurer<States2, Events> transitions)
			throws Exception {
		transitions
			.withJoin()
				.source(States2.S2F)
				.source(States2.S3F)
				.target(States2.S4)
				.and()
			.withExternal()
				.source(States2.S4)
				.target(States2.S5)
				.guardExpression("!extendedState.variables.isEmpty()")
				.and()
			.withExternal()
				.source(States2.S4)
				.target(States2.SF)
				.guardExpression("extendedState.variables.isEmpty()");
	}
}
退出和入口点状态
您可以使用退出点和入场点来执行更受控的退出和进入作
从 和 进入 Submachine。
以下示例使用withEntry和withExit定义入口点的方法:
@Configuration
@EnableStateMachine
static class Config21 extends StateMachineConfigurerAdapter<String, String> {

	@Override
	public void configure(StateMachineStateConfigurer<String, String> states)
			throws Exception {
		states
		.withStates()
			.initial("S1")
			.state("S2")
			.state("S3")
			.and()
			.withStates()
				.parent("S2")
				.initial("S21")
				.entry("S2ENTRY")
				.exit("S2EXIT")
				.state("S22");
	}

	@Override
	public void configure(StateMachineTransitionConfigurer<String, String> transitions)
			throws Exception {
		transitions
		.withExternal()
			.source("S1").target("S2")
			.event("E1")
			.and()
		.withExternal()
			.source("S1").target("S2ENTRY")
			.event("ENTRY")
			.and()
		.withExternal()
			.source("S22").target("S2EXIT")
			.event("EXIT")
			.and()
		.withEntry()
			.source("S2ENTRY").target("S22")
			.and()
		.withExit()
			.source("S2EXIT").target("S3");
	}
}
如上所示,您需要将特定状态标记为exit和entry国家。然后,创建到这些状态的正常过渡
并指定withExit()和withEntry(),其中这些状态
分别退出和进入。
配置通用设置
您可以使用ConfigurationConfigurer.有了它,您可以设置BeanFactory和一个 autostart 标志
对于状态机。它还允许您注册StateMachineListener实例
配置转换冲突策略和区域执行策略。
以下示例演示如何使用ConfigurationConfigurer:
@Configuration
@EnableStateMachine
public class Config17
		extends EnumStateMachineConfigurerAdapter<States, Events> {

	@Override
	public void configure(StateMachineConfigurationConfigurer<States, Events> config)
			throws Exception {
		config
			.withConfiguration()
				.autoStartup(true)
				.machineId("myMachineId")
				.beanFactory(new StaticListableBeanFactory())
				.listener(new StateMachineListenerAdapter<States, Events>())
				.transitionConflictPolicy(TransitionConflictPolicy.CHILD)
				.regionExecutionPolicy(RegionExecutionPolicy.PARALLEL);
	}
}
默认情况下,状态机autoStartup标志被禁用,因为所有
处理子状态的实例由状态机本身控制
并且无法自动启动。此外,离开要安全得多
是否应启动计算机
自动或不向用户。此标志仅控制
顶级状态机。
设置machineId在配置类中,只是为了方便
你想或需要在那里做。
注册StateMachineListenerinstances 也部分用于
方便,但如果您想在
状态机生命周期,例如获取状态机的
start 和 stop 事件。请注意,您不能监听 state
machine 的 start 事件 ifautoStartup处于启用状态,除非您注册侦听器
在配置阶段。
您可以使用transitionConflictPolicy当多个
可以选择过渡路径。一个常见的用例是
machine 包含从子状态引出的匿名转换
和一个父状态,并且您希望定义一个策略,其中
选择。这是计算机实例中的全局设置,
默认为CHILD.
您可以使用withDistributed()配置DistributedStateMachine.它
允许您设置StateMachineEnsemble,它(如果存在)会自动
包装任何创建的StateMachine跟DistributedStateMachine和
启用分布式模式。以下示例演示如何使用它:
@Configuration
@EnableStateMachine
public class Config18
		extends EnumStateMachineConfigurerAdapter<States, Events> {

	@Override
	public void configure(StateMachineConfigurationConfigurer<States, Events> config)
			throws Exception {
		config
			.withDistributed()
				.ensemble(stateMachineEnsemble());
	}

	@Bean
	public StateMachineEnsemble<States, Events> stateMachineEnsemble()
			throws Exception {
		// naturally not null but should return ensemble instance
		return null;
	}
}
有关分布式状态的更多信息,请参阅使用分布式状态。
这StateMachineModelVerifierinterface 在内部用于
对状态机的结构进行一些健全性检查。其目的是
fail fast,而不是让常见的配置错误进入
状态机。默认情况下,验证程序会自动启用,并且DefaultStateMachineModelVerifierimplementation 的 implementation 的 API 中。
跟withVerifier(),如果
需要。以下示例显示了如何执行此作:
@Configuration
@EnableStateMachine
public class Config19
		extends EnumStateMachineConfigurerAdapter<States, Events> {

	@Override
	public void configure(StateMachineConfigurationConfigurer<States, Events> config)
			throws Exception {
		config
			.withVerifier()
				.enabled(true)
				.verifier(verifier());
	}

	@Bean
	public StateMachineModelVerifier<States, Events> verifier() {
		return new StateMachineModelVerifier<States, Events>() {

			@Override
			public void verify(StateMachineModel<States, Events> model) {
				// throw exception indicating malformed model
			}
		};
	}
}
有关配置模型的更多信息,请参见 StateMachine 配置模型。
这withSecurity,withMonitoring和withPersistence配置方法
记录在状态机安全性、监控状态机和用StateMachineRuntimePersister分别。 |
配置模型
StateMachineModelFactory是一个钩子,允许您配置 StateMachine 模型
无需使用手动配置。本质上,它是一个第三方
integration 集成到配置模型中。
您可以钩住StateMachineModelFactory导入到配置模型中
使用StateMachineModelConfigurer.以下示例显示了如何执行此作:
@Configuration
@EnableStateMachine
public static class Config1 extends StateMachineConfigurerAdapter<String, String> {

	@Override
	public void configure(StateMachineModelConfigurer<String, String> model) throws Exception {
		model
			.withModel()
				.factory(modelFactory());
	}

	@Bean
	public StateMachineModelFactory<String, String> modelFactory() {
		return new CustomStateMachineModelFactory();
	}
}
以下示例使用CustomStateMachineModelFactory自
定义两个状态 (S1和S2) 和事件 (E1)
国家:
public static class CustomStateMachineModelFactory implements StateMachineModelFactory<String, String> {

	@Override
	public StateMachineModel<String, String> build() {
		ConfigurationData<String, String> configurationData = new ConfigurationData<>();
		Collection<StateData<String, String>> stateData = new ArrayList<>();
		stateData.add(new StateData<String, String>("S1", true));
		stateData.add(new StateData<String, String>("S2"));
		StatesData<String, String> statesData = new StatesData<>(stateData);
		Collection<TransitionData<String, String>> transitionData = new ArrayList<>();
		transitionData.add(new TransitionData<String, String>("S1", "S2", "E1"));
		TransitionsData<String, String> transitionsData = new TransitionsData<>(transitionData);
		StateMachineModel<String, String> stateMachineModel = new DefaultStateMachineModel<String, String>(configurationData,
				statesData, transitionsData);
		return stateMachineModel;
	}

	@Override
	public StateMachineModel<String, String> build(String machineId) {
		return build();
	}
}
| 定义自定义模型通常不是人们正在寻找的, 虽然这是可能的。然而,这是一个允许 对此配置模型的外部访问。 |
您可以在 Eclipse Modeling Support 中找到使用此 Model Factory 集成的示例。您可以找到有关自定义模型集成的更多通用信息 在 Developer Documentation(开发人员文档)中。
要记住的事情
当从
配置,记住 Spring Framework 的工作原理是值得的
和豆子。在下一个示例中,我们定义了一个普通配置,其中
国家S1和S2以及它们之间的四个过渡。所有过渡
由guard1或guard2.您必须确保guard1创建为真正的 Bean,因为它带有@Bean而guard2莫。
这意味着该事件E3将获得guard2condition 设置为TRUE和E4将获得guard2condition 设置为FALSE,因为这些是
来自对这些函数的普通方法调用。
但是,由于guard1定义为@Bean,它由
Spring 框架。因此,对其方法的额外调用会导致
只有该实例的一个实例。事件E1将首先获取
条件TRUE、while 事件E2会得到相同的
实例替换为TRUEcondition 定义方法调用时使用FALSE.这不是 Spring State Machine 特有的行为。相反,它是
Spring Framework 如何与 bean 一起工作。
以下示例显示了这种安排的工作原理:
@Configuration
@EnableStateMachine
public class Config1
		extends StateMachineConfigurerAdapter<String, String> {

	@Override
	public void configure(StateMachineStateConfigurer<String, String> states)
			throws Exception {
		states
			.withStates()
				.initial("S1")
				.state("S2");
	}

	@Override
	public void configure(StateMachineTransitionConfigurer<String, String> transitions)
			throws Exception {
		transitions
			.withExternal()
				.source("S1").target("S2").event("E1").guard(guard1(true))
				.and()
			.withExternal()
				.source("S1").target("S2").event("E2").guard(guard1(false))
				.and()
			.withExternal()
				.source("S1").target("S2").event("E3").guard(guard2(true))
				.and()
			.withExternal()
				.source("S1").target("S2").event("E4").guard(guard2(false));
	}

	@Bean
	public Guard<String, String> guard1(final boolean value) {
		return new Guard<String, String>() {
			@Override
			public boolean evaluate(StateContext<String, String> context) {
				return value;
			}
		};
	}

	public Guard<String, String> guard2(final boolean value) {
		return new Guard<String, String>() {
			@Override
			public boolean evaluate(StateContext<String, String> context) {
				return value;
			}
		};
	}
}
状态机 ID
各种类和接口使用machineId作为变量或
parameter 的 Method。本节将详细介绍如何machineId与正常的机器作和实例化有关。
在运行时,machineId真的没什么大的运营
role 除外,以区分机器 — 例如,当
跟踪日志或进行更深入的调试。有很多不同的
如果有 Machine Instances 的话,开发人员很快就会迷失在翻译中
没有简单的方法来识别这些实例。因此,我们添加了将machineId.
用@EnableStateMachine
设置machineId在 Java 配置中为mymachine然后公开该值
用于日志。这同样machineId也可从StateMachine.getId()方法。以下示例使用machineId方法:
@Override
public void configure(StateMachineConfigurationConfigurer<String, String> config)
		throws Exception {
	config
		.withConfiguration()
			.machineId("mymachine");
}
以下日志输出示例显示了mymachine编号:
11:23:54,509  INFO main support.LifecycleObjectSupport [main] -
started S2 S1 / S1 / uuid=8fe53d34-8c85-49fd-a6ba-773da15fcaf1 / id=mymachine| 手动构建器(参见 通过 Builder 进行状态机)使用相同的配置 接口,这意味着行为是等效的。 |
用@EnableStateMachineFactory
你可以看到同样的machineIdGetting Configuration(如果您使用StateMachineFactory并使用该 ID 请求新计算机,
如下例所示:
StateMachineFactory<String, String> factory = context.getBean(StateMachineFactory.class);
StateMachine<String, String> machine = factory.getStateMachine("mymachine");
用StateMachineModelFactory
在后台,所有机器配置首先转换为StateMachineModel因此StateMachineFactory无需知道
从配置的来源,因为机器可以构建
Java 配置、UML 或存储库。如果你想疯狂,你也可以使用自定义的StateMachineModel,这是可能的最低值
定义配置的级别。
所有这些都与 a 有什么关系machineId?StateMachineModelFactory还有一个具有以下签名的方法:StateMachineModel<S, E> build(String machineId)其中 aStateMachineModelFactoryimplementation 可以选择 use。
RepositoryStateMachineModelFactory(请参阅存储库支持)使用machineId在持久
store 通过 Spring Data Repository 接口。例如,两者StateRepository和TransitionRepository有一个方法 (List<T>
findByMachineId(String machineId))、构建不同的状态和
transitions 的machineId.跟RepositoryStateMachineModelFactory如果machineId用作 empty
或 NULL,则默认为 repository configuration(在后备持久模型中)
没有已知的计算机 ID。
现在UmlStateMachineModelFactory不区分
不同的计算机 ID,因为 UML 源总是来自同一
文件。在未来的版本中,这可能会发生变化。 |
状态机工厂
有些用例需要动态创建状态机 而不是通过在编译时定义静态配置。例如 如果存在使用自己的状态机的自定义组件 而这些组件是动态创建的,不可能有 在应用程序启动期间构建的静态状态机。内部 状态机始终通过工厂接口构建。这 为您提供以编程方式使用此功能的选项。 状态机工厂的配置与所示完全相同 在本文档中的各种示例中,其中状态机配置 是硬编码的。
通过适配器出厂
实际使用@EnableStateMachine通过工厂工作,因此@EnableStateMachineFactory仅暴露
该工厂通过其接口。以下示例使用@EnableStateMachineFactory:
@Configuration
@EnableStateMachineFactory
public class Config6
		extends EnumStateMachineConfigurerAdapter<States, Events> {

	@Override
	public void configure(StateMachineStateConfigurer<States, Events> states)
			throws Exception {
		states
			.withStates()
				.initial(States.S1)
				.end(States.SF)
				.states(EnumSet.allOf(States.class));
	}

}
现在您已经使用了@EnableStateMachineFactory创建 Factory 的步骤
你可以注入它并(按原样)使用它来
请求新的状态机。以下示例显示了如何执行此作:
public class Bean3 {

	@Autowired
	StateMachineFactory<States, Events> factory;

	void method() {
		StateMachine<States,Events> stateMachine = factory.getStateMachine();
		stateMachine.startReactively().subscribe();
	}
}
通过 Builder 进行状态机
使用适配器(如上所示)有一个限制,其
通过 Spring 工作的要求@Configuration类和
应用程序上下文。虽然这是一个非常清晰的模型,用于配置
state machine 时,它会在编译时限制配置,
这并不总是用户想要做的。如果有要求
要构建更多动态状态机,您可以使用简单的构建器模式
以构造类似的实例。通过使用字符串作为状态和
事件,您可以使用此构建器模式来构建完全动态的 state
machines 在 Spring 应用程序上下文之外。以下示例
演示如何执行此作:
StateMachine<String, String> buildMachine1() throws Exception {
	Builder<String, String> builder = StateMachineBuilder.builder();
	builder.configureStates()
		.withStates()
			.initial("S1")
			.end("SF")
			.states(new HashSet<String>(Arrays.asList("S1","S2","S3","S4")));
	return builder.build();
}
构建器在后台使用相同的配置接口,这些接口
这@ConfigurationAdapter 类的 model 用途。相同的模型用于
通过构建器的
方法。这意味着,无论您可以将EnumStateMachineConfigurerAdapter或StateMachineConfigurerAdapter您可以通过生成器动态使用。
目前,builder.configureStates(),builder.configureTransitions(),
和builder.configureConfiguration()接口方法不能是
链接在一起,这意味着需要单独调用 Builder 方法。 |
以下示例使用 builder 设置许多选项:
StateMachine<String, String> buildMachine2() throws Exception {
	Builder<String, String> builder = StateMachineBuilder.builder();
	builder.configureConfiguration()
		.withConfiguration()
			.autoStartup(false)
			.beanFactory(null)
			.listener(null);
	return builder.build();
}
您需要了解常见配置何时需要
用于从 Builder 实例化的计算机。您可以使用 configurer
从withConfiguration()设置autoStart和BeanFactory.
您也可以使用一个 API 来注册StateMachineListener.如果StateMachine从构建器返回的实例通过使用@Bean,BeanFactory将自动附加。如果您在 Spring 应用程序上下文之外使用实例,则
您必须使用这些方法来设置所需的设施。
使用延迟事件
发送事件时,它可能会触发EventTrigger,这可能会导致
如果状态机处于触发器为
评估成功。通常,这可能会导致
事件未被接受并被丢弃。但是,您可能希望
将此事件推迟到状态机进入另一个状态。在这种情况下,
您可以接受该事件。换句话说,一个事件
来得不是时候。
Spring Statemachine 提供了一种将事件推迟到以后的机制 加工。每个状态都可以有一个延迟事件列表。如果事件 在当前状态的 Deferred Event List occurs 中,保存该事件 (deferred) 以供将来处理,直到输入未列出的状态 其 Deferred Event 列表中的事件。当进入此类状态时, 状态机会自动调用任何已保存的不再 deferred,然后使用或丢弃这些事件。这是可能的 使 Superstate 在延迟的事件上定义转换 按子状态。遵循相同的分层状态机概念,子状态 优先于超状态,则事件被延迟,并且 transi 的 TRANSITION 未运行。对于正交区域, 当一个正交区域推迟事件而另一个正交区域接受事件时, accept 优先,事件被使用而不是延迟。
事件延迟最明显的用例是事件导致 转换到特定状态,然后返回状态机 恢复到其原始状态,其中第二个事件应导致相同的 过渡。以下示例显示了这种情况:
@Configuration
@EnableStateMachine
static class Config5 extends StateMachineConfigurerAdapter<String, String> {

	@Override
	public void configure(StateMachineStateConfigurer<String, String> states)
			throws Exception {
		states
			.withStates()
				.initial("READY")
				.state("DEPLOYPREPARE", "DEPLOY")
				.state("DEPLOYEXECUTE", "DEPLOY");
	}

	@Override
	public void configure(StateMachineTransitionConfigurer<String, String> transitions)
			throws Exception {
		transitions
			.withExternal()
				.source("READY").target("DEPLOYPREPARE")
				.event("DEPLOY")
				.and()
			.withExternal()
				.source("DEPLOYPREPARE").target("DEPLOYEXECUTE")
				.and()
			.withExternal()
				.source("DEPLOYEXECUTE").target("READY");
	}
}
在前面的示例中,状态机的状态为READY,这表示机器是
ready 处理事件,这些事件会将其转换为DEPLOYstate 中,其中
实际部署将发生。运行部署作后,计算机
将返回到READY州。在READYstate 不会造成任何麻烦,如果机器正在使用同步执行程序,则
因为事件发送会在事件调用之间阻塞。但是,如果 executor 使用
threads 中,其他事件可能会丢失,因为机器不再处于
可以处理事件。因此,延迟其中一些事件可以让机器
保留它们。以下示例说明如何配置此类安排:
@Configuration
@EnableStateMachine
static class Config6 extends StateMachineConfigurerAdapter<String, String> {

	@Override
	public void configure(StateMachineStateConfigurer<String, String> states)
			throws Exception {
		states
			.withStates()
				.initial("READY")
				.state("DEPLOY", "DEPLOY")
				.state("DONE")
				.and()
				.withStates()
					.parent("DEPLOY")
					.initial("DEPLOYPREPARE")
					.state("DEPLOYPREPARE", "DONE")
					.state("DEPLOYEXECUTE");
	}

	@Override
	public void configure(StateMachineTransitionConfigurer<String, String> transitions)
			throws Exception {
		transitions
			.withExternal()
				.source("READY").target("DEPLOY")
				.event("DEPLOY")
				.and()
			.withExternal()
				.source("DEPLOYPREPARE").target("DEPLOYEXECUTE")
				.and()
			.withExternal()
				.source("DEPLOYEXECUTE").target("READY")
				.and()
			.withExternal()
				.source("READY").target("DONE")
				.event("DONE")
				.and()
			.withExternal()
				.source("DEPLOY").target("DONE")
				.event("DONE");
	}
}
在前面的示例中,状态机使用嵌套状态而不是 flat
state 模型,因此DEPLOY事件可以直接在子状态中延迟。
它还演示了延迟DONEevent 中
子状态,然后覆盖
这DEPLOY和DONE状态机是否恰好位于DEPLOYPREPAREstate 时,DONE事件。在DEPLOYEXECUTEstate 时,DONE事件未延迟,则此事件将
在超级状态下处理。
使用范围
对状态机中范围的支持非常有限,但您可以
使session范围使用普通的 Spring@Scopeannotation 中:
-
如果状态机是使用构建器手动构建的,并返回到 context 作为
@Bean. -
通过配置适配器。
两者
这些需要@Scope要存在,请使用scopeName设置为session和proxyMode设置为ScopedProxyMode.TARGET_CLASS.以下示例
显示两个用例:
@Configuration
public class Config3 {

	@Bean
	@Scope(scopeName="session", proxyMode=ScopedProxyMode.TARGET_CLASS)
	StateMachine<String, String> stateMachine() throws Exception {
		Builder<String, String> builder = StateMachineBuilder.builder();
		builder.configureConfiguration()
			.withConfiguration()
				.autoStartup(true);
		builder.configureStates()
			.withStates()
				.initial("S1")
				.state("S2");
		builder.configureTransitions()
			.withExternal()
				.source("S1")
				.target("S2")
				.event("E1");
		StateMachine<String, String> stateMachine = builder.build();
		return stateMachine;
	}

}
@Configuration
@EnableStateMachine
@Scope(scopeName="session", proxyMode=ScopedProxyMode.TARGET_CLASS)
public static class Config4 extends StateMachineConfigurerAdapter<String, String> {

	@Override
	public void configure(StateMachineConfigurationConfigurer<String, String> config) throws Exception {
		config
			.withConfiguration()
				.autoStartup(true);
	}

	@Override
	public void configure(StateMachineStateConfigurer<String, String> states) throws Exception {
		states
			.withStates()
				.initial("S1")
				.state("S2");
	}

	@Override
	public void configure(StateMachineTransitionConfigurer<String, String> transitions) throws Exception {
		transitions
			.withExternal()
				.source("S1")
				.target("S2")
				.event("E1");
	}

}
提示:有关如何使用会话范围的信息,请参阅 Scope。
将状态机的范围限定为session,将其自动连接到
一个@Controller为每个会话提供一个新的状态机实例。
然后,当HttpSession无效。
以下示例展示了如何在控制器中使用状态机:
@Controller
public class StateMachineController {

	@Autowired
	StateMachine<String, String> stateMachine;

	@RequestMapping(path="/state", method=RequestMethod.POST)
	public HttpEntity<Void> setState(@RequestParam("event") String event) {
		stateMachine
			.sendEvent(Mono.just(MessageBuilder
				.withPayload(event).build()))
			.subscribe();
		return new ResponseEntity<Void>(HttpStatus.ACCEPTED);
	}

	@RequestMapping(path="/state", method=RequestMethod.GET)
	@ResponseBody
	public String getState() {
		return stateMachine.getState().getId();
	}
}
在session范围需要仔细规划,
主要是因为它是一个相对较重的组件。 |
| Spring Statemachine poms 不依赖于 Spring MVC 类,您需要使用 session 范围。但是,如果你是 使用 Web 应用程序时,您已经拉取了这些依赖项 直接从 Spring MVC 或 Spring Boot 获取。 |
使用作
作是可用于的最有用的组件之一 与状态机交互和协作。您可以运行作 在状态机及其状态生命周期的不同位置——例如, 进入或退出状态或在过渡期间。 以下示例显示了如何在状态机中使用作:
@Override
public void configure(StateMachineStateConfigurer<States, Events> states)
		throws Exception {
	states
		.withStates()
			.initial(States.SI)
			.state(States.S1, action1(), action2())
			.state(States.S2, action1(), action2())
			.state(States.S3, action1(), action3());
}
在前面的示例中,action1和action2bean 附加到entry和exit状态。以下示例定义这些作 (以及action3):
@Bean
public Action<States, Events> action1() {
	return new Action<States, Events>() {

		@Override
		public void execute(StateContext<States, Events> context) {
		}
	};
}

@Bean
public BaseAction action2() {
	return new BaseAction();
}

@Bean
public SpelAction action3() {
	ExpressionParser parser = new SpelExpressionParser();
	return new SpelAction(
			parser.parseExpression(
					"stateMachine.sendEvent(T(org.springframework.statemachine.docs.Events).E1)"));
}

public class BaseAction implements Action<States, Events> {

	@Override
	public void execute(StateContext<States, Events> context) {
	}
}

public class SpelAction extends SpelExpressionAction<States, Events> {

	public SpelAction(Expression expression) {
		super(expression);
	}
}
您可以直接实现Action作为匿名函数或创建
您自己的实现,并将相应的实现定义为
豆。
在前面的示例中,action3使用 SpEL 表达式发送Events.E1event 转换为
状态机。
StateContext在用StateContext. |
反应式作
正常Actioninterface 是一个简单的功能方法,采用StateContext并返回 void。在你阻止之前,这里没有任何阻碍
在方法本身中,这是一个有点问题,因为框架不能
了解它内部到底发生了什么。
public interface Action<S, E> {
	void execute(StateContext<S, E> context);
}
为了解决这个问题,我们在内部进行了更改Actionhandling 设置为
处理普通 Java 的Function取StateContext并返回Mono.这样我们就可以调用 action 并完全以响应式方式
execute作,仅当它被订阅且以非阻塞方式执行
等待完成。
public interface ReactiveAction<S, E> extends Function<StateContext<S, E>, Mono<Void>> {
}
|
内部陈旧 |
使用守卫
如 Things to Remember 中所示,guard1和guard2bean 附加到 entry 和
退出状态。
以下示例还对事件使用 guards:
@Override
public void configure(StateMachineTransitionConfigurer<States, Events> transitions)
		throws Exception {
	transitions
		.withExternal()
			.source(States.SI).target(States.S1)
			.event(Events.E1)
			.guard(guard1())
			.and()
		.withExternal()
			.source(States.S1).target(States.S2)
			.event(Events.E1)
			.guard(guard2())
			.and()
		.withExternal()
			.source(States.S2).target(States.S3)
			.event(Events.E2)
			.guardExpression("extendedState.variables.get('myvar')");
}
您可以直接实现Guard作为匿名函数或创建
您自己的实现,并将相应的实现定义为
豆。在前面的示例中,guardExpressioncheckS 是否扩展了
state 变量myvar计算结果为TRUE.
下面的示例实现一些示例 guards:
@Bean
public Guard<States, Events> guard1() {
	return new Guard<States, Events>() {

		@Override
		public boolean evaluate(StateContext<States, Events> context) {
			return true;
		}
	};
}

@Bean
public BaseGuard guard2() {
	return new BaseGuard();
}

public class BaseGuard implements Guard<States, Events> {

	@Override
	public boolean evaluate(StateContext<States, Events> context) {
		return false;
	}
}
StateContext在用StateContext. |
带守卫的 SPEL 表达式
您还可以使用 SPEL 表达式来替代
完整的 Guard 实现。唯一的要求是表达式需要
要返回Boolean值来满足Guard实现。这可以是
演示使用guardExpression()函数,该函数采用
expression 作为参数。
响应式守卫
正常Guardinterface 是一个简单的功能方法,采用StateContext并返回 boolean。在你阻止之前,这里没有任何阻碍
在方法本身中,这是一个有点问题,因为框架不能
了解它内部到底发生了什么。
public interface Guard<S, E> {
	boolean evaluate(StateContext<S, E> context);
}
为了解决这个问题,我们在内部进行了更改Guardhandling 设置为
处理普通 Java 的Function取StateContext并返回Mono<Boolean>.这样我们就可以调用 guard 并且完全以响应方式
仅在订阅时以非阻塞方式对其进行评估
等待 return 值完成。
public interface ReactiveGuard<S, E> extends Function<StateContext<S, E>, Mono<Boolean>> {
}
|
内部陈旧 |
使用扩展状态
假设您需要创建一个状态机来跟踪 很多时候,用户按下键盘上的某个键,然后终止 当按键被按下 1000 次时。一个可能但非常幼稚的解决方案 将是每按 1000 次按键创建一个新状态。 您可能会突然出现一个天文数字 状态,这自然不是很实用。
这就是扩展状态变量通过不需要 以添加更多状态来驱动状态机更改。相反 您可以在过渡期间执行简单的变量更改。
StateMachine有一个名为getExtendedState().它返回一个
接口调用ExtendedState,它提供对扩展状态的访问
变量。您可以通过状态机或通过StateContext在 actions 或 transitions 回调期间。
以下示例显示了如何执行此作:
public Action<String, String> myVariableAction() {
	return new Action<String, String>() {

		@Override
		public void execute(StateContext<String, String> context) {
			context.getExtendedState()
				.getVariables().put("mykey", "myvalue");
		}
	};
}
如果您需要获得扩展状态变量的通知
changes,您有两个选项:要么使用StateMachineListener或
监听extendedStateChanged(key, value)回调。以下示例
使用extendedStateChanged方法:
public class ExtendedStateVariableListener
		extends StateMachineListenerAdapter<String, String> {

	@Override
	public void extendedStateChanged(Object key, Object value) {
		// do something with changed variable
	}
}
或者,你可以为OnExtendedStateChanged.如 侦听状态机事件 中所述,
您也可以全部收听StateMachineEvent事件。
以下示例使用onApplicationEvent要监听状态变化:
public class ExtendedStateVariableEventListener
		implements ApplicationListener<OnExtendedStateChanged> {

	@Override
	public void onApplicationEvent(OnExtendedStateChanged event) {
		// do something with changed variable
	}
}
用StateContext
StateContext是最重要的对象之一
当使用状态机时,因为它被传递到各种方法中
和回调来给出状态机的当前状态,以及
它可能去哪里。您可以将其视为
当前状态机阶段的快照
是StateContext被检索。
在 Spring Statemachine 1.0.x 中,StateContext使用相对天真
就它如何被用来作为简单的 “POJO” 传递东西而言。
从 Spring Statemachine 1.1.x 开始,它的作用已经大大
通过使其成为状态机中的一等公民而得到改进。 |
您可以使用StateContext以访问以下内容:
-
当前的
Message或Event(或其MessageHeaders(如果已知))。 -
状态机的
Extended State. -
这
StateMachine本身。 -
到可能的状态机错误。
-
到当前
Transition(如果适用)。 -
状态机的源状态。
-
状态机的目标状态。
-
当前的
Stage,如 Stages 中所述。
StateContext传递到各种组件中,例如Action和Guard.
触发过渡
驱动状态机是通过使用触发的转换来完成的
by 触发器。当前支持的触发器包括EventTrigger和TimerTrigger.
用EventTrigger
EventTrigger是最有用的触发器,因为它允许您
通过向状态机发送事件来直接与状态机交互。这些
事件也称为信号。您可以向过渡添加触发器
通过在配置期间将状态与其关联。
以下示例显示了如何执行此作:
@Autowired
StateMachine<String, String> stateMachine;

void signalMachine() {
	stateMachine
		.sendEvent(Mono.just(MessageBuilder
			.withPayload("E1").build()))
		.subscribe();

	Message<String> message = MessageBuilder
			.withPayload("E2")
			.setHeader("foo", "bar")
			.build();
	stateMachine.sendEvent(Mono.just(message)).subscribe();
}
无论您是发送一个事件还是多个事件,结果始终是一个序列
的结果。之所以如此,是因为在存在多个 reqions 的情况下,结果将
从这些区域中的多台计算机返回。这是
with 方法sendEventCollect,它给出了一个结果列表。方法
本身只是一个语法糖收集Fluxas 列表。如果有
只有一个地区,此列表包含一个结果。
Message<String> message1 = MessageBuilder
	.withPayload("E1")
	.build();

Mono<List<StateMachineEventResult<String, String>>> results =
	stateMachine.sendEventCollect(Mono.just(message1));

results.subscribe();
| 在订阅返回的 flux 之前,什么都不会发生。从 StateMachineEventResult 中了解更多信息。 |
前面的示例通过构造Mono包皮
一个Message并订阅 returnedFlux的结果。Message让
我们向事件添加任意的额外信息,然后该信息可见
自StateContext当 (例如) 实施作时。
消息标头通常会一直传递,直到机器运行
完成特定事件。例如,如果事件导致
过渡到 StateA它们具有匿名转换为
州B,原始事件可用于状态B. |
也可以发送Flux的消息,而不仅仅是发送
一个具有Mono.
Message<String> message1 = MessageBuilder
	.withPayload("E1")
	.build();
Message<String> message2 = MessageBuilder
	.withPayload("E2")
	.build();

Flux<StateMachineEventResult<String, String>> results =
	stateMachine.sendEvents(Flux.just(message1, message2));

results.subscribe();
用TimerTrigger
TimerTrigger在需要触发某些作时很有用
自动的。Trigger已添加到
transition 的 TRANSITION。
目前,有两种类型的受支持的计时器,一种是触发 持续触发,并在进入源状态后触发。 以下示例演示如何使用触发器:
@Configuration
@EnableStateMachine
public class Config2 extends StateMachineConfigurerAdapter<String, String> {

	@Override
	public void configure(StateMachineStateConfigurer<String, String> states)
			throws Exception {
		states
			.withStates()
				.initial("S1")
				.state("S2")
				.state("S3");
	}

	@Override
	public void configure(StateMachineTransitionConfigurer<String, String> transitions)
			throws Exception {
		transitions
			.withExternal()
				.source("S1").target("S2").event("E1")
				.and()
			.withExternal()
				.source("S1").target("S3").event("E2")
				.and()
			.withInternal()
				.source("S2")
				.action(timerAction())
				.timer(1000)
				.and()
			.withInternal()
				.source("S3")
				.action(timerAction())
				.timerOnce(1000);
	}

	@Bean
	public TimerAction timerAction() {
		return new TimerAction();
	}
}

public class TimerAction implements Action<String, String> {

	@Override
	public void execute(StateContext<String, String> context) {
		// do something in every 1 sec
	}
}
前面的示例有三种状态:S1,S2和S3.我们有一个正常的
外部过渡S1自S2和 从S1自S3跟
事件E1和E2分别。有趣的部分
用于TimerTrigger是当我们定义
源状态的内部过渡S2和S3.
对于这两个转换,我们调用ActionBean (timerAction),其中
源状态S2使用timer和S3使用timerOnce.
给出的值以毫秒为单位 (1000毫秒,或者在两种情况下都是 1 秒)。
一旦状态机收到事件E1,它会执行过渡
从S1自S2计时器开始计时。当状态为S2,TimerTrigger运行并导致与该
state — 在本例中,具有timerAction定义。
一旦状态机收到E2,事件会执行
从S1自S3计时器开始计时。此计时器仅执行一次
在 state 被输入之后 (在 timer 中定义的 delay 之后)。
在幕后,计时器是简单的触发器,可能会导致
transition 到 Happen 的 Transition。使用timer()保持
仅当 source state 为 active 时,触发才会触发并导致 transition。
过渡timerOnce()有点不同,因为它
仅在实际进入源状态时延迟后触发。 |
用timerOnce()如果您希望在延迟后发生某些事情
在 State 进入时恰好一次。 |
侦听状态机事件
在一些用例中,您想知道发生了什么 状态机、对某事做出反应或获取 调试目的。Spring Statemachine 提供了用于添加侦听器的接口。这些侦听器 然后给出一个选项,以便在各种 state 发生变化时获取回调, 作,等等。
您基本上有两个选择:监听 Spring 应用程序 context 事件或直接将侦听器附加到状态机。两者 这些基本上提供相同的信息。一个产生 events 作为事件类,另一个通过侦听器生成回调 接口。这两者都有优点和缺点,我们将在后面讨论。
应用程序上下文事件
应用程序上下文事件类是OnTransitionStartEvent,OnTransitionEvent,OnTransitionEndEvent,OnStateExitEvent,OnStateEntryEvent,OnStateChangedEvent,OnStateMachineStart,OnStateMachineStop以及其他扩展基事件类StateMachineEvent.这些可以按原样与 Spring 一起使用ApplicationListener.
StateMachine通过以下方式发送上下文事件StateMachineEventPublisher.
如果@Configurationclass 的@EnableStateMachine.
以下示例获取StateMachineApplicationEventListener从@Configuration类:
public class StateMachineApplicationEventListener
		implements ApplicationListener<StateMachineEvent> {

	@Override
	public void onApplicationEvent(StateMachineEvent event) {
	}
}

@Configuration
public class ListenerConfig {

	@Bean
	public StateMachineApplicationEventListener contextListener() {
		return new StateMachineApplicationEventListener();
	}
}
上下文事件也会通过使用@EnableStateMachine,
跟StateMachine用于构建机器并注册为 bean,
如下例所示:
@Configuration
@EnableStateMachine
public class ManualBuilderConfig {

	@Bean
	public StateMachine<String, String> stateMachine() throws Exception {

		Builder<String, String> builder = StateMachineBuilder.builder();
		builder.configureStates()
			.withStates()
				.initial("S1")
				.state("S2");
		builder.configureTransitions()
			.withExternal()
				.source("S1")
				.target("S2")
				.event("E1");
		return builder.build();
	}
}
用StateMachineListener
通过使用StateMachineListener,您可以扩展它,然后
实现所有回调方法或使用StateMachineListenerAdapter类,其中包含存根方法实现,并选择哪些实现
以覆盖。
以下示例使用后一种方法:
public class StateMachineEventListener
		extends StateMachineListenerAdapter<States, Events> {

	@Override
	public void stateChanged(State<States, Events> from, State<States, Events> to) {
	}

	@Override
	public void stateEntered(State<States, Events> state) {
	}

	@Override
	public void stateExited(State<States, Events> state) {
	}

	@Override
	public void transition(Transition<States, Events> transition) {
	}

	@Override
	public void transitionStarted(Transition<States, Events> transition) {
	}

	@Override
	public void transitionEnded(Transition<States, Events> transition) {
	}

	@Override
	public void stateMachineStarted(StateMachine<States, Events> stateMachine) {
	}

	@Override
	public void stateMachineStopped(StateMachine<States, Events> stateMachine) {
	}

	@Override
	public void eventNotAccepted(Message<Events> event) {
	}

	@Override
	public void extendedStateChanged(Object key, Object value) {
	}

	@Override
	public void stateMachineError(StateMachine<States, Events> stateMachine, Exception exception) {
	}

	@Override
	public void stateContext(StateContext<States, Events> stateContext) {
	}
}
在前面的示例中,我们创建了自己的 listener 类
(StateMachineEventListener),该StateMachineListenerAdapter.
这stateContextlistener 方法允许访问各种StateContext不同阶段的变化。您可以在用StateContext.
定义自己的侦听器后,您可以在
状态机使用addStateListener方法。这是一个
flavor 是将其挂接在 Spring 配置中还是执行
在应用程序生命周期内的任何时间手动作。
以下示例显示如何附加侦听器:
public class Config7 {

	@Autowired
	StateMachine<States, Events> stateMachine;

	@Bean
	public StateMachineEventListener stateMachineEventListener() {
		StateMachineEventListener listener = new StateMachineEventListener();
		stateMachine.addStateListener(listener);
		return listener;
	}

}
限制和问题
Spring 应用程序上下文并不是最快的事件总线,因此我们
建议考虑一下状态机的事件发生率
发送。为了获得更好的性能,最好使用StateMachineListener接口。出于这个特定的原因,
您可以使用contextEventsflag 替换为@EnableStateMachine和@EnableStateMachineFactory禁用 Spring 应用程序上下文
事件,如上一节所示。
以下示例显示如何禁用 Spring 应用程序上下文事件:
@Configuration
@EnableStateMachine(contextEvents = false)
public class Config8
		extends EnumStateMachineConfigurerAdapter<States, Events> {
}

@Configuration
@EnableStateMachineFactory(contextEvents = false)
public class Config9
		extends EnumStateMachineConfigurerAdapter<States, Events> {
}
上下文集成
通过以下方式与状态机进行交互有点受限 监听其事件或使用带有 state 和 转换。有时,这种方法会过于有限,并且 verbose 创建与状态机的应用程序的交互 工程。对于这个特定的用例,我们制作了一个 Spring 风格的 轻松插入状态机功能的上下文集成 放入你的豆子里。
可用的注释已协调,以便能够访问相同的 可从 Listening to State Machine Events 获得的状态机执行点。
您可以使用@WithStateMachine用于关联状态的注释
machine 中。然后你就可以开始添加
该 bean 的方法的 supported 注释。
以下示例显示了如何执行此作:
@WithStateMachine
public class Bean1 {

	@OnTransition
	public void anyTransition() {
	}
}
您还可以从
使用 Annotation 的应用程序上下文name田。
以下示例显示了如何执行此作:
@WithStateMachine(name = "myMachineBeanName")
public class Bean2 {

	@OnTransition
	public void anyTransition() {
	}
}
有时,使用起来更方便machine id,这是
您可以设置以更好地识别多个实例。此 ID 映射到
这getId()方法中的StateMachine接口。
以下示例演示如何使用它:
@WithStateMachine(id = "myMachineId")
public class Bean16 {

	@OnTransition
	public void anyTransition() {
	}
}
当使用 StateMachineFactory 生成状态机时,状态机使用 dynamic 提供的id,bean name 将默认为stateMachine不能使用@WithStateMachine (id = "some-id")因为id仅在运行时已知。
在这种情况下,请使用@WithStateMachine或@WithStateMachine(name = "stateMachine")并且工厂生成的所有状态机都将附加到你的一个或多个 bean。
您还可以使用@WithStateMachine作为元注释,如图所示
在前面的示例中。在这种情况下,您可以使用WithMyBean.
以下示例显示了如何执行此作:
@Target(ElementType.TYPE)
@Retention(RetentionPolicy.RUNTIME)
@WithStateMachine(name = "myMachineBeanName")
public @interface WithMyBean {
}
| 这些方法的返回类型无关紧要,并且实际上是 丢弃。 |
启用集成
您可以启用@WithStateMachine通过使用
这@EnableWithStateMachineannotation 中,它会导入所需的
配置导入到 Spring Application Context 中。双@EnableStateMachine和@EnableStateMachineFactory已经
使用此注释进行注释,因此无需再次添加它。
但是,如果机器在构建和配置时没有
配置适配器,您必须使用@EnableWithStateMachine要将这些功能与@WithStateMachine.
以下示例显示了如何执行此作:
public static StateMachine<String, String> buildMachine(BeanFactory beanFactory) throws Exception {
	Builder<String, String> builder = StateMachineBuilder.builder();

	builder.configureConfiguration()
		.withConfiguration()
			.machineId("myMachineId")
			.beanFactory(beanFactory);

	builder.configureStates()
		.withStates()
			.initial("S1")
			.state("S2");

	builder.configureTransitions()
		.withExternal()
			.source("S1")
			.target("S2")
			.event("E1");

	return builder.build();
}

@WithStateMachine(id = "myMachineId")
static class Bean17 {

	@OnStateChanged
	public void onStateChanged() {
	}
}
如果机器不是作为 Bean 创建的,则需要将BeanFactory对于计算机,如前面的示例所示。否则,tge 机器为
不知道调用@WithStateMachine方法。 |
方法参数
每个 Comments 都支持完全相同的可能方法
参数,但运行时行为会有所不同,具体取决于
annotation 本身以及调用 annotated 方法的阶段。自
更好地了解上下文的工作原理,请参阅用StateContext.
| 有关方法参数之间的差异,请参阅定义 单独的注释。 |
实际上,所有带 Comments 的方法都是通过使用 Spring SPel 来调用的
表达式,这些表达式在此过程中动态构建。要使
this work,这些表达式需要有一个 root 对象(它们根据该对象进行求值)。
此根对象是一个StateContext.我们还制作了一些
在内部进行调整,以便可以访问StateContext方法
直接访问,而无需通过上下文句柄。
最简单的方法参数是StateContext本身。
以下示例演示如何使用它:
@WithStateMachine
public class Bean3 {

	@OnTransition
	public void anyTransition(StateContext<String, String> stateContext) {
	}
}
您可以访问StateContext内容。
参数的数量和顺序无关紧要。
以下示例显示了如何访问StateContext内容:
@WithStateMachine
public class Bean4 {

	@OnTransition
	public void anyTransition(
			@EventHeaders Map<String, Object> headers,
			@EventHeader("myheader1") Object myheader1,
			@EventHeader(name = "myheader2", required = false) String myheader2,
			ExtendedState extendedState,
			StateMachine<String, String> stateMachine,
			Message<String> message,
			Exception e) {
	}
}
而不是使用@EventHeaders,您可以使用@EventHeader,它可以绑定到单个标头。 |
过渡批注
过渡的注释是@OnTransition,@OnTransitionStart,
和@OnTransitionEnd.
这些注释的行为完全相同。为了展示它们的工作原理,我们展示了
如何@OnTransition被使用。在此注解中,属性的
您可以使用source和target以限定过渡。如果source和target留空,则匹配任何过渡。
以下示例演示如何使用@OnTransition注解
(请记住@OnTransitionStart和@OnTransitionEnd以相同的方式工作):
@WithStateMachine
public class Bean5 {

	@OnTransition(source = "S1", target = "S2")
	public void fromS1ToS2() {
	}

	@OnTransition
	public void anyTransition() {
	}
}
默认情况下,您不能使用@OnTransition注解中带有 state 和
由于 Java 语言限制,您创建的 event 枚举。
因此,您需要使用字符串表示形式。
此外,您还可以访问Event Headers和ExtendedState通过向方法添加所需的参数。方法
然后,使用这些参数自动调用。
以下示例显示了如何执行此作:
@WithStateMachine
public class Bean6 {

	@StatesOnTransition(source = States.S1, target = States.S2)
	public void fromS1ToS2(@EventHeaders Map<String, Object> headers, ExtendedState extendedState) {
	}
}
但是,如果您想拥有类型安全的注解,则可以
创建新注释并使用@OnTransition作为元注释。
此用户级注释可以引用实际状态和
events 枚举,框架会尝试以相同的方式匹配这些枚举。
以下示例显示了如何执行此作:
@Target(ElementType.METHOD)
@Retention(RetentionPolicy.RUNTIME)
@OnTransition
public @interface StatesOnTransition {

	States[] source() default {};

	States[] target() default {};
}
在前面的示例中,我们创建了一个@StatesOnTransition注解定义source和target以类型安全的方式。
下面的示例在 bean 中使用该 Comments:
@WithStateMachine
public class Bean7 {

	@StatesOnTransition(source = States.S1, target = States.S2)
	public void fromS1ToS2() {
	}
}
状态注释
可以使用以下状态注释:@OnStateChanged,@OnStateEntry和@OnStateExit.以下示例演示如何使用OnStateChanged注解(
其他两个的工作方式相同):
@WithStateMachine
public class Bean8 {

	@OnStateChanged
	public void anyStateChange() {
	}
}
就像使用 Transition Annotations 一样,您可以定义 target 和 source 状态。以下示例显示了如何执行此作:
@WithStateMachine
public class Bean9 {

	@OnStateChanged(source = "S1", target = "S2")
	public void stateChangeFromS1toS2() {
	}
}
为了类型安全,需要使用@OnStateChanged作为元注释。以下示例说明如何执行此作:
@Target(ElementType.METHOD)
@Retention(RetentionPolicy.RUNTIME)
@OnStateChanged
public @interface StatesOnStates {

	States[] source() default {};

	States[] target() default {};
}
@WithStateMachine
public class Bean10 {

	@StatesOnStates(source = States.S1, target = States.S2)
	public void fromS1ToS2() {
	}
}
state entry 和 exit 的方法的行为方式相同,如下例所示:
@WithStateMachine
public class Bean11 {

	@OnStateEntry
	public void anyStateEntry() {
	}

	@OnStateExit
	public void anyStateExit() {
	}
}
事件注释
有一个与事件相关的注释。它被命名为@OnEventNotAccepted.
如果指定event属性,您可以监听特定事件而不是
接受。如果未指定事件,则可以列出任何非
接受。以下示例显示了使用@OnEventNotAccepted注解:
@WithStateMachine
public class Bean12 {

	@OnEventNotAccepted
	public void anyEventNotAccepted() {
	}

	@OnEventNotAccepted(event = "E1")
	public void e1EventNotAccepted() {
	}
}
状态机注释
以下注释可用于状态机:@OnStateMachineStart,@OnStateMachineStop和@OnStateMachineError.
在状态机启动和停止期间,将调用生命周期方法。
以下示例演示如何使用@OnStateMachineStart和@OnStateMachineStop要监听这些事件:
@WithStateMachine
public class Bean13 {

	@OnStateMachineStart
	public void onStateMachineStart() {
	}

	@OnStateMachineStop
	public void onStateMachineStop() {
	}
}
如果状态机出现异常错误,@OnStateMachineStopannotation 调用。以下示例演示如何使用它:
@WithStateMachine
public class Bean14 {

	@OnStateMachineError
	public void onStateMachineError() {
	}
}
用StateMachineAccessor
StateMachine是与状态机通信的主接口。
有时,您可能需要变得更加动态和
以编程方式访问状态机的内部结构及其
嵌套计算机和区域。对于这些使用案例,StateMachine公开一个名为StateMachineAccessor,它提供
用于访问个人的接口StateMachine和Region实例。
StateMachineFunction是一个简单的功能接口,它允许
您将StateMachineAccess接口。跟
JDK 7 创建的代码有点冗长。但是,使用 JDK 8 lambda 时,
DOCE 相对不冗长。
这doWithAllRegionsmethod 允许访问所有Region中的 实例
状态机。以下示例演示如何使用它:
stateMachine.getStateMachineAccessor().doWithAllRegions(function -> function.setRelay(stateMachine));

stateMachine.getStateMachineAccessor()
	.doWithAllRegions(access -> access.setRelay(stateMachine));
这doWithRegionmethod 允许访问单个Region实例中
状态机。以下示例演示如何使用它:
stateMachine.getStateMachineAccessor().doWithRegion(function -> function.setRelay(stateMachine));

stateMachine.getStateMachineAccessor()
	.doWithRegion(access -> access.setRelay(stateMachine));
这withAllRegionsmethod 可以访问所有Region中的 实例
状态机。以下示例演示如何使用它:
for (StateMachineAccess<String, String> access : stateMachine.getStateMachineAccessor().withAllRegions()) {
	access.setRelay(stateMachine);
}

stateMachine.getStateMachineAccessor().withAllRegions()
	.stream().forEach(access -> access.setRelay(stateMachine));
这withRegionmethod 允许访问单个Region实例中
状态机。以下示例演示如何使用它:
stateMachine.getStateMachineAccessor()
	.withRegion().setRelay(stateMachine);
用StateMachineInterceptor
而不是使用StateMachineListener界面中,您可以
使用StateMachineInterceptor.一个概念上的区别是,您可以使用
interceptor 拦截和停止当前状态
更改或更改其过渡逻辑。而不是实现完整的接口,
您可以使用名为StateMachineInterceptorAdapter覆盖
默认的 no-op 方法。
| 一个配方 (Persist) 和一个示例 ([statemachine-examples-persist]) 与使用 拦截 器。 |
您可以通过StateMachineAccessor.的概念
拦截器是一个相对较深的内部特征,因此不是
直接通过StateMachine接口。
以下示例演示如何添加StateMachineInterceptor并覆盖选定项
方法:
stateMachine.getStateMachineAccessor()
	.withRegion().addStateMachineInterceptor(new StateMachineInterceptor<String, String>() {

		@Override
		public Message<String> preEvent(Message<String> message, StateMachine<String, String> stateMachine) {
			return message;
		}

		@Override
		public StateContext<String, String> preTransition(StateContext<String, String> stateContext) {
			return stateContext;
		}

		@Override
		public void preStateChange(State<String, String> state, Message<String> message,
				Transition<String, String> transition, StateMachine<String, String> stateMachine,
				StateMachine<String, String> rootStateMachine) {
		}

		@Override
		public StateContext<String, String> postTransition(StateContext<String, String> stateContext) {
			return stateContext;
		}

		@Override
		public void postStateChange(State<String, String> state, Message<String> message,
				Transition<String, String> transition, StateMachine<String, String> stateMachine,
				StateMachine<String, String> rootStateMachine) {
		}

		@Override
		public Exception stateMachineError(StateMachine<String, String> stateMachine,
				Exception exception) {
			return exception;
		}
	});
| 有关前面示例中显示的错误处理的更多信息,请参阅状态机错误处理。 |
状态机安全
安全功能建立在 Spring Security 的功能之上。安全功能包括 当需要保护状态机的一部分时非常方便 执行和与之交互。
| 我们希望您对 Spring Security 相当熟悉,这意味着 我们不会详细介绍整体安全框架的工作原理。为 此信息,您应该阅读 Spring Security 参考文档 (可在此处获得)。 |
安全的第一级防御自然是保护事件, 这真正推动了将要 发生在状态机中。然后,您可以定义更精细的安全设置 用于过渡和作。这与允许员工进入架构物类似 然后授予对架构物内特定房间的访问权限,甚至 以打开和关闭特定房间中的灯。如果您信任 您的用户,事件安全性可能就是您所需要的。如果没有, 您需要应用更详细的安全性。
您可以在了解安全性中找到更多详细信息。
| 有关完整示例,请参阅 Security 示例。 |
配置安全性
所有安全性的通用配置都在SecurityConfigurer,该 API 可从StateMachineConfigurationConfigurer.默认情况下,安全性处于禁用状态,
即使 Spring Security 类是
目前。以下示例说明如何启用安全性:
@Configuration
@EnableStateMachine
static class Config4 extends StateMachineConfigurerAdapter<String, String> {

	@Override
	public void configure(StateMachineConfigurationConfigurer<String, String> config)
			throws Exception {
		config
			.withSecurity()
				.enabled(true)
				.transitionAccessDecisionManager(null)
				.eventAccessDecisionManager(null);
	}
}
如果您绝对需要,您可以自定义AccessDecisionManager对于 event 和
转换。如果您未定义决策管理器或
将它们设置为null,则默认管理器是在内部创建的。
保护事件
事件安全性在全局级别由SecurityConfigurer.
以下示例显示如何启用事件安全性:
@Configuration
@EnableStateMachine
static class Config1 extends StateMachineConfigurerAdapter<String, String> {

	@Override
	public void configure(StateMachineConfigurationConfigurer<String, String> config)
			throws Exception {
		config
			.withSecurity()
				.enabled(true)
				.event("true")
				.event("ROLE_ANONYMOUS", ComparisonType.ANY);
	}
}
在前面的配置示例中,我们使用true,它始终会评估
自TRUE.使用始终计算结果为TRUE在实际应用程序中没有意义,但表明了这一点
expression 需要返回TRUE或FALSE.我们还定义了一个
属性ROLE_ANONYMOUS以及ComparisonType之ANY.有关使用属性的更多信息
和表达式,请参阅使用安全属性和表达式。
保护过渡
您可以全局定义过渡安全性,如下例所示。
@Configuration
@EnableStateMachine
static class Config6 extends StateMachineConfigurerAdapter<String, String> {

	@Override
	public void configure(StateMachineConfigurationConfigurer<String, String> config)
			throws Exception {
		config
			.withSecurity()
				.enabled(true)
				.transition("true")
				.transition("ROLE_ANONYMOUS", ComparisonType.ANY);
	}
}
如果在转换本身中定义了安全性,则它会覆盖任何 全局设置安全性。以下示例显示了如何执行此作:
@Configuration
@EnableStateMachine
static class Config2 extends StateMachineConfigurerAdapter<String, String> {

	@Override
	public void configure(StateMachineTransitionConfigurer<String, String> transitions)
			throws Exception {
		transitions
			.withExternal()
				.source("S0")
				.target("S1")
				.event("A")
				.secured("ROLE_ANONYMOUS", ComparisonType.ANY)
				.secured("hasTarget('S1')");
	}
}
有关使用属性和表达式的更多信息,请参阅使用安全属性和表达式。
保护作
状态中的作没有专用的安全定义
machine 中,但您可以使用全局方法 security 来保护作
来自 Spring Security。这要求Action是
定义为代理@Bean及其executemethod 进行注释@Secured.以下示例显示了如何执行此作:
@Configuration
@EnableStateMachine
static class Config3 extends StateMachineConfigurerAdapter<String, String> {

	@Override
	public void configure(StateMachineConfigurationConfigurer<String, String> config)
			throws Exception {
		config
			.withSecurity()
				.enabled(true);
	}

	@Override
	public void configure(StateMachineStateConfigurer<String, String> states)
			throws Exception {
		states
			.withStates()
				.initial("S0")
				.state("S1");
	}

	@Override
	public void configure(StateMachineTransitionConfigurer<String, String> transitions)
			throws Exception {
		transitions
			.withExternal()
				.source("S0")
				.target("S1")
				.action(securedAction())
				.event("A");
	}

	@Scope(proxyMode = ScopedProxyMode.TARGET_CLASS)
	@Bean
	public Action<String, String> securedAction() {
		return new Action<String, String>() {

			@Secured("ROLE_ANONYMOUS")
			@Override
			public void execute(StateContext<String, String> context) {
			}
		};
	}

}
需要使用 Spring Security 启用全局方法安全性。 以下示例显示了如何执行此作:
@Configuration
public static class Config5 {

	@Bean
	public InMemoryUserDetailsManager userDetailsService() {
		UserDetails user = User.withDefaultPasswordEncoder()
				.username("user")
				.password("password")
				.roles("USER")
				.build();
		return new InMemoryUserDetailsManager(user);
	}
}
有关更多详细信息,请参阅 Spring Security 参考指南(在此处提供)。
使用安全属性和表达式
通常,您可以通过以下两种方式之一定义安全属性:通过 使用安全属性和通过使用安全表达式。 属性更易于使用,但在 功能性。表达式提供了更多功能,但有点 更难使用。
泛型属性用法
默认情况下,AccessDecisionManagerevents 的实例和
过渡都使用RoleVoter,这意味着您可以使用角色属性
来自 Spring Security。
对于属性,我们有三种不同的比较类型:ANY,ALL和MAJORITY.这些比较类型映射到默认访问决策管理器
(AffirmativeBased,UnanimousBased和ConsensusBased)。
如果您定义了自定义AccessDecisionManager,则比较类型为
有效地丢弃,因为它仅用于创建默认管理器。
泛型表达式用法
安全表达式必须返回TRUE或FALSE.
表达式根对象的基类是SecurityExpressionRoot.它提供了一些常见的表达式,这些表达式
在 Transition 和 Event Security 中均可用。下表
描述最常用的内置表达式:
| 表达 | 描述 |
|---|---|
|
返回 |
|
返回 |
|
返回 |
|
返回 |
|
允许直接访问表示 当前用户。 |
|
允许直接访问当前的 |
|
Always 的计算结果为 |
|
Always 的计算结果为 |
|
返回 |
|
返回 |
|
返回 |
|
返回 |
|
返回 |
|
返回 |
了解安全性
本节提供了有关安全性在 状态机。你可能真的不需要知道,但确实需要 保持透明总是更好,而不是隐藏所有的魔法 发生在幕后。
只有当 Spring Statemachine 在封闭的
garden 中,用户无法直接访问应用程序,因此可能会
修改 Spring Security 的SecurityContexthold 在本地线程中。
如果用户控制 JVM,那么实际上就没有安全性
完全。 |
安全性集成点是使用StateMachineInterceptor,然后会自动添加到
状态机(如果启用了安全性)。具体类为StateMachineSecurityInterceptor,它拦截事件和
转换。然后,此拦截器会查询 Spring Security 的AccessDecisionManager确定是否可以发送事件或是否可以发送过渡
执行。实际上,如果一个决定或投票中带有AccessDecisionManager导致异常,则 event 或 transition 被拒绝。
由于如何AccessDecisionManager从 Spring Security Works 开始,我们
每个 Secure Object 需要一个 IT 实例。这就是为什么有
是事件和过渡的不同管理器。在这种情况下,事件
和 transitions 是我们保护的不同类对象。
默认情况下,对于事件,投票者 (EventExpressionVoter,EventVoter和RoleVoter) 添加到AccessDecisionManager.
默认情况下,对于过渡,投票者 (TransitionExpressionVoter,TransitionVoter和RoleVoter) 添加到AccessDecisionManager.
状态机错误处理
如果状态机在状态转换期间检测到内部错误 logic,它可能会引发异常。处理此异常之前 在内部,您有机会进行拦截。
通常,您可以使用StateMachineInterceptor来拦截错误,并使用
下面的清单显示了一个示例:
StateMachine<String, String> stateMachine;

void addInterceptor() {
	stateMachine.getStateMachineAccessor()
			.doWithRegion(function ->
				function.addStateMachineInterceptor(new StateMachineInterceptorAdapter<String, String>() {
					@Override
					public Exception stateMachineError(StateMachine<String, String> stateMachine,
													   Exception exception) {
						return exception;
					}
				})
			);

}
当检测到错误时,将执行正常事件通知机制。
这允许您使用StateMachineListener或 Spring 应用程序
context 事件侦听器。有关这些内容的更多信息,请参阅侦听状态机事件。
话虽如此,下面的示例显示了一个简单的侦听器:
public class ErrorStateMachineListener
		extends StateMachineListenerAdapter<String, String> {

	@Override
	public void stateMachineError(StateMachine<String, String> stateMachine, Exception exception) {
		// do something with error
	}
}
以下示例显示了一个泛型ApplicationListener检查StateMachineEvent:
public class GenericApplicationEventListener
		implements ApplicationListener<StateMachineEvent> {

	@Override
	public void onApplicationEvent(StateMachineEvent event) {
		if (event instanceof OnStateMachineError) {
			// do something with error
		}
	}
}
您也可以直接定义ApplicationListener自
仅识别StateMachineEvent实例,如下例所示:
public class ErrorApplicationEventListener
		implements ApplicationListener<OnStateMachineError> {

	@Override
	public void onApplicationEvent(OnStateMachineError event) {
		// do something with error
	}
}
| 为 transition 定义的 Action 也有自己的错误处理 逻辑。请参阅 Transition Action 错误处理。 |
使用响应式 API 时,可能会出现 Action execution 错误
从 StateMachineEventResult 返回。拥有简单的机器
作中的错误转换为 stateS1.
@Configuration
@EnableStateMachine
static class Config1 extends StateMachineConfigurerAdapter<String, String> {

	@Override
	public void configure(StateMachineStateConfigurer<String, String> states) throws Exception {
		states
			.withStates()
				.initial("SI")
				.stateEntry("S1", (context) -> {
					throw new RuntimeException("example error");
				});
	}

	@Override
	public void configure(StateMachineTransitionConfigurer<String, String> transitions) throws Exception {
		transitions
			.withExternal()
				.source("SI")
				.target("S1")
				.event("E1");
	}
}
下面的测试概念显示了如何消耗可能的误差 从 StateMachineEventResult 获取。
@Autowired
private StateMachine<String, String> machine;

@Test
public void testActionEntryErrorWithEvent() throws Exception {
	StepVerifier.create(machine.startReactively()).verifyComplete();
	assertThat(machine.getState().getIds()).containsExactlyInAnyOrder("SI");

	StepVerifier.create(machine.sendEvent(Mono.just(MessageBuilder.withPayload("E1").build())))
		.consumeNextWith(result -> {
			StepVerifier.create(result.complete()).consumeErrorWith(e -> {
				assertThat(e).isInstanceOf(StateMachineException.class).cause().hasMessageContaining("example error");
			}).verify();
		})
		.verifyComplete();

	assertThat(machine.getState().getIds()).containsExactlyInAnyOrder("S1");
}
| 进入/退出作中的错误不会阻止转换的发生。 |
持久化状态机
传统上,状态机的实例在 running 程序。您可以通过使用 动态构建器和工厂,允许 State Machine 实例化。构建状态机的实例是一个 作相对较重。因此,如果您需要(例如)处理 使用状态机在数据库中进行任意状态更改,您需要 找到一种更好、更快的方法来做到这一点。
persist 功能允许您保存状态机的状态 添加到外部存储库中,然后根据 serialized 状态。例如,如果您有一个数据库表保存 orders,则使用 state 更新 Order state 的成本太高了 machine 的实例。 persist 功能允许您在没有 实例化新的状态机实例。
| 有一个配方(请参阅 Persist)和一个示例 (参见 [statemachine-examples-persist]),它提供了有关 持久状态。 |
虽然您可以使用StateMachineListener,它有一个概念问题。当侦听器
通知状态更改,则状态更改已发生。如果
自定义持久化方法无法更新序列化的
state 中,状态机中的状态和
外部存储库将处于不一致状态。
您可以改用状态机拦截器来尝试保存
序列化状态到外部存储中
state machine 内的 change 进行如果该拦截器回调失败,
您可以停止状态更改尝试,而不是以
inconsistent 状态,然后您可以手动处理此错误。看用StateMachineInterceptor了解如何使用拦截器。
用StateMachineContext
您不能持久化StateMachine使用普通 Java
序列化,因为对象图太丰富并且包含太多
对其他 Spring 上下文类的依赖。StateMachineContext是状态机的运行时表示形式,您可以使用它来
将现有计算机还原到由特定StateMachineContext对象。
StateMachineContext包含两种不同的信息包含
对于子上下文。这些通常在机器包含
正交区域。首先,上下文可以具有子上下文的列表
可以按原样使用,就好像它们存在一样。其次,您可以
包括原始上下文子级
未到位。这些子引用实际上是
保留运行多个并行区域的计算机
独立地。
| Data Multi Persist 示例显示 如何持久保存并行区域。 |
用StateMachinePersister
构建StateMachineContext然后恢复状态机
如果完成的话,它总是有一点点 “黑魔法”
手动地。这StateMachinePersisterINTERFACE 旨在缓解这些
作persist和restore方法。默认的
此接口的实现为DefaultStateMachinePersister.
我们可以展示如何使用StateMachinePersister通过以下
A 测试中的片段。我们首先创建两个类似的配置
(machine1和machine2) 用于状态机。请注意,我们可以构建不同的
机器以其他方式进行演示,但 this way
适用于这种情况。以下示例配置两个状态机:
@Configuration
@EnableStateMachine(name = "machine1")
static class Config1 extends Config {
}

@Configuration
@EnableStateMachine(name = "machine2")
static class Config2 extends Config {
}

static class Config extends StateMachineConfigurerAdapter<String, String> {

	@Override
	public void configure(StateMachineStateConfigurer<String, String> states) throws Exception {
		states
			.withStates()
				.initial("S1")
				.state("S1")
				.state("S2");
	}

	@Override
	public void configure(StateMachineTransitionConfigurer<String, String> transitions) throws Exception {
		transitions
			.withExternal()
				.source("S1")
				.target("S2")
				.event("E1");
	}
}
由于我们使用StateMachinePersist对象,我们可以在内存中创建一个
实现。
| 此内存中示例仅用于演示目的。真实 applications 中,您应该使用真正的持久存储实现。 |
下面的清单显示了如何使用内存中示例:
static class InMemoryStateMachinePersist implements StateMachinePersist<String, String, String> {

	private final HashMap<String, StateMachineContext<String, String>> contexts = new HashMap<>();

	@Override
	public void write(StateMachineContext<String, String> context, String contextObj) throws Exception {
		contexts.put(contextObj, context);
	}

	@Override
	public StateMachineContext<String, String> read(String contextObj) throws Exception {
		return contexts.get(contextObj);
	}
}
在我们实例化了两台不同的机器之后,我们可以将machine1进入状态S2THROUGH 事件E1.然后我们可以持久化它并恢复machine2.以下示例显示了如何执行此作:
InMemoryStateMachinePersist stateMachinePersist = new InMemoryStateMachinePersist();
StateMachinePersister<String, String, String> persister = new DefaultStateMachinePersister<>(stateMachinePersist);

StateMachine<String, String> stateMachine1 = context.getBean("machine1", StateMachine.class);
StateMachine<String, String> stateMachine2 = context.getBean("machine2", StateMachine.class);
stateMachine1.startReactively().block();

stateMachine1
	.sendEvent(Mono.just(MessageBuilder
		.withPayload("E1").build()))
	.blockLast();
assertThat(stateMachine1.getState().getIds()).containsExactly("S2");

persister.persist(stateMachine1, "myid");
persister.restore(stateMachine2, "myid");
assertThat(stateMachine2.getState().getIds()).containsExactly("S2");
使用 Redis
RepositoryStateMachinePersist(它实现StateMachinePersist) 支持将状态机持久化到 Redis 中。
具体实现是RedisStateMachineContextRepository,它使用kryoserialization 设置为
持久化一个StateMachineContext到Redis.
为StateMachinePersister,我们有一个 Redis 相关的RedisStateMachinePersisterimplementation 的 API 实例,它采用
一个StateMachinePersist和用途String作为其 context 对象。
| 有关详细用法,请参阅 事件服务 示例。 |
RedisStateMachineContextRepository需要一个RedisConnectionFactory让它工作。我们建议使用JedisConnectionFactory,如前面的示例所示。
用StateMachineRuntimePersister
StateMachineRuntimePersister是StateMachinePersist这添加了一个接口级方法以获取StateMachineInterceptor与之相关联。然后,这个拦截器是
需要在 state 更改期间持久化机器,而无需
停止和启动计算机。
目前,此接口有
支持的 Spring Data Repositories。这些实现是JpaPersistingStateMachineInterceptor,MongoDbPersistingStateMachineInterceptor,
和RedisPersistingStateMachineInterceptor.
| 有关详细用法,请参阅 Data Persist 示例。 |
Spring Boot 支持
自动配置模块 (spring-statemachine-autoconfigure) 包含所有
与 Spring Boot 集成的逻辑,它为
自动配置和执行器。您所需要的只是拥有这个 Spring Statemachine
库作为启动应用程序的一部分。
监控和跟踪
BootStateMachineMonitor是自动创建的,并与
状态机。BootStateMachineMonitor是自定义的StateMachineMonitor与 Spring Boot 的MeterRegistry和终端节点
通过自定义StateMachineTraceRepository.或者,您可以禁用此自动配置
通过设置spring.statemachine.monitor.enabled键设置为false.Monitoring 示例显示了如何使用此自动配置。
存储库配置
如果从 Classpath 中找到所需的类,则 Spring Data Repositories 实体类扫描会自动配置 以获取存储库支持。
当前支持的配置包括JPA,Redis和MongoDB.您可以使用spring.statemachine.data.jpa.repositories.enabled,spring.statemachine.data.redis.repositories.enabled和spring.statemachine.data.mongo.repositories.enabled属性。
监视状态机
您可以使用StateMachineMonitor要获取有关
执行过渡和作所花费的时间的持续时间。以下清单
演示如何实现此接口。
public class TestStateMachineMonitor extends AbstractStateMachineMonitor<String, String> {

	@Override
	public void transition(StateMachine<String, String> stateMachine, Transition<String, String> transition,
			long duration) {
	}

	@Override
	public void action(StateMachine<String, String> stateMachine,
			Function<StateContext<String, String>, Mono<Void>> action, long duration) {
	}
}
一旦你有了StateMachineMonitorimplementation 中,您可以将其添加到
通过配置的状态机,如下例所示:
@Configuration
@EnableStateMachine
public class Config1 extends StateMachineConfigurerAdapter<String, String> {

	@Override
	public void configure(StateMachineConfigurationConfigurer<String, String> config)
			throws Exception {
		config
			.withMonitoring()
				.monitor(stateMachineMonitor());
	}

	@Override
	public void configure(StateMachineStateConfigurer<String, String> states) throws Exception {
		states
			.withStates()
				.initial("S1")
				.state("S2");
	}

	@Override
	public void configure(StateMachineTransitionConfigurer<String, String> transitions) throws Exception {
		transitions
			.withExternal()
				.source("S1")
				.target("S2")
				.event("E1");
	}

	@Bean
	public StateMachineMonitor<String, String> stateMachineMonitor() {
		return new TestStateMachineMonitor();
	}
}
| 有关详细用法,请参阅 Monitoring 示例。 |
使用分布式状态
分布式状态可能是 Spring 状态机。究竟什么是分布式状态?状态 在单个状态机中自然很容易理解, 但是,当需要引入共享分布式状态时 通过状态机,事情会变得有点复杂。
| 分布式状态功能仍是一项预览功能,并非 但被认为在此特定版本中是稳定的。我们期待这一点 功能使其成熟到第一个正式版本。 |
分布式状态机是通过DistributedStateMachine包装实际实例的类
的StateMachine.DistributedStateMachine拦截
与StateMachine实例,并与
分布式状态抽象通过StateMachineEnsemble接口。根据实际实现,
您还可以使用StateMachinePersist接口来序列化StateMachineContext,其中包含足够的信息来重置StateMachine.
虽然分布式状态机是通过抽象实现的, 当前仅存在一个实现。它基于 Zookeeper。
以下示例显示如何配置基于 Zookeeper 的分布式状态 machine' 的
@Configuration
@EnableStateMachine
public class Config
		extends StateMachineConfigurerAdapter<String, String> {

	@Override
	public void configure(StateMachineConfigurationConfigurer<String, String> config)
			throws Exception {
		config
			.withDistributed()
				.ensemble(stateMachineEnsemble())
				.and()
			.withConfiguration()
				.autoStartup(true);
	}

	@Override
	public void configure(StateMachineStateConfigurer<String, String> states)
			throws Exception {
		// config states
	}

	@Override
	public void configure(StateMachineTransitionConfigurer<String, String> transitions)
			throws Exception {
		// config transitions
	}

	@Bean
	public StateMachineEnsemble<String, String> stateMachineEnsemble()
			throws Exception {
		return new ZookeeperStateMachineEnsemble<String, String>(curatorClient(), "/zkpath");
	}

	@Bean
	public CuratorFramework curatorClient()
			throws Exception {
		CuratorFramework client = CuratorFrameworkFactory
				.builder()
				.defaultData(new byte[0])
				.connectString("localhost:2181").build();
		client.start();
		return client;
	}

}
您可以找到基于 Zookeeker 的分布式 附录中的状态机。
用ZookeeperStateMachineEnsemble
ZookeeperStateMachineEnsemble本身需要两个强制设置,
一个curatorClient以及basePath.客户端是一个CuratorFramework,路径是Zookeeper实例。
或者,您可以将cleanState,默认为TRUE如果 ensemble 中不存在成员,则清除现有数据。您可以设置
它来FALSE如果要在
应用程序重新启动。
(可选)您可以设置logSize(默认值
自32) 更改为 Keep history of state changes。这个
set 必须是 2 的幂。32通常是一个不错的默认值
价值。如果特定状态机被
大小,则会进入 Error 状态并与
ensemble 的 Ensemble 表示它已经失去了它的历史和完全重建
synchronized 状态。
测试支持
我们还添加了一组实用程序类来简化状态测试 machine 实例。这些在框架本身中使用,但也 对最终用户非常有用。
StateMachineTestPlanBuilder构建一个StateMachineTestPlan,
它有一个方法(称为test()).该方法运行一个计划。StateMachineTestPlanBuilder包含一个 Fluent Builder API,允许您添加
步骤。在这些步骤中,您可以发送事件并检查
各种条件,例如状态更改、转换和扩展状态
变量。
以下示例使用StateMachineBuilder要构建状态机:
private StateMachine<String, String> buildMachine() throws Exception {
	StateMachineBuilder.Builder<String, String> builder = StateMachineBuilder.builder();

	builder.configureConfiguration()
		.withConfiguration()
			.autoStartup(true);

	builder.configureStates()
			.withStates()
				.initial("SI")
				.state("S1");

	builder.configureTransitions()
			.withExternal()
				.source("SI").target("S1")
				.event("E1")
				.action(c -> {
					c.getExtendedState().getVariables().put("key1", "value1");
				});

	return builder.build();
}
在下面的测试计划中,我们有两个步骤。首先,我们检查初始
状态 (SI) 确实已设置。其次,我们发送一个事件 (E1) 并期望
发生一个状态更改,并预期机器最终处于S1.
下面的清单显示了测试计划:
StateMachine<String, String> machine = buildMachine();
StateMachineTestPlan<String, String> plan =
		StateMachineTestPlanBuilder.<String, String>builder()
			.defaultAwaitTime(2)
			.stateMachine(machine)
			.step()
				.expectStates("SI")
				.and()
			.step()
				.sendEvent("E1")
				.expectStateChanged(1)
				.expectStates("S1")
				.expectVariable("key1")
				.expectVariable("key1", "value1")
				.expectVariableWith(hasKey("key1"))
				.expectVariableWith(hasValue("value1"))
				.expectVariableWith(hasEntry("key1", "value1"))
				.expectVariableWith(not(hasKey("key2")))
				.and()
			.build();
plan.test();
这些实用程序还在框架中用于测试分布式 状态机功能。请注意,您可以将多台计算机添加到一个计划中。 如果您添加多台计算机,您还可以选择 将事件发送到特定计算机、随机计算机或所有计算机。
前面的测试示例使用以下 Hamcrest 导入:
All possible options for expected results are documented in the Javadoc for
StateMachineTestPlanStepBuilder.
Eclipse Modeling Support
Defining a state machine configuration with UI modeling is supported
through the Eclipse Papyrus framework.
From the Eclipse wizard, you can create a new Papyrus Model with the UML Diagram
Language. In this example, it is named simple-machine. Then you
have an option to choose from various diagram kinds, and you must choose a StateMachine
Diagram.
We want to create a machine that has two states (S1 and S2), where
S1 is the initial state. Then, we need to create event E1 to do a transition
from S1 to S2. In Papyrus, a machine would then look like something
the following example:
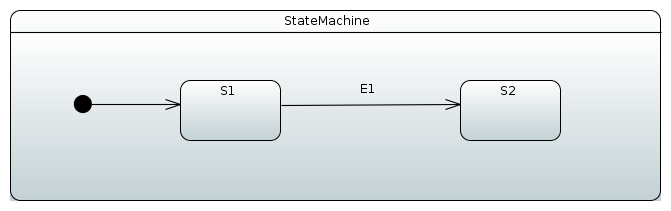
Behind the scenes, a raw UML file would look like the following example:
<?xml version="1.0" encoding="UTF-8"?>
<uml:Model xmi:version="20131001" xmlns:xmi="http://www.omg.org/spec/XMI/20131001" xmlns:uml="http://www.eclipse.org/uml2/5.0.0/UML" xmi:id="_AMP3IP8fEeW45bORGB4c_A" name="RootElement">
<packagedElement xmi:type="uml:StateMachine" xmi:id="_AMRFQP8fEeW45bORGB4c_A" name="StateMachine">
<region xmi:type="uml:Region" xmi:id="_AMRsUP8fEeW45bORGB4c_A" name="Region1">
<transition xmi:type="uml:Transition" xmi:id="_chgcgP8fEeW45bORGB4c_A" source="_EZrg4P8fEeW45bORGB4c_A" target="_FAvg4P8fEeW45bORGB4c_A">
<trigger xmi:type="uml:Trigger" xmi:id="_hs5jUP8fEeW45bORGB4c_A" event="_NeH84P8fEeW45bORGB4c_A"/>
</transition>
<transition xmi:type="uml:Transition" xmi:id="_egLIoP8fEeW45bORGB4c_A" source="_Fg0IEP8fEeW45bORGB4c_A" target="_EZrg4P8fEeW45bORGB4c_A"/>
<subvertex xmi:type="uml:State" xmi:id="_EZrg4P8fEeW45bORGB4c_A" name="S1"/>
<subvertex xmi:type="uml:State" xmi:id="_FAvg4P8fEeW45bORGB4c_A" name="S2"/>
<subvertex xmi:type="uml:Pseudostate" xmi:id="_Fg0IEP8fEeW45bORGB4c_A"/>
</region>
</packagedElement>
<packagedElement xmi:type="uml:Signal" xmi:id="_L01D0P8fEeW45bORGB4c_A" name="E1"/>
<packagedElement xmi:type="uml:SignalEvent" xmi:id="_NeH84P8fEeW45bORGB4c_A" name="SignalEventE1" signal="_L01D0P8fEeW45bORGB4c_A"/>
</uml:Model>
When opening an existing model that has been defined as UML, you have three
files: .di, .notation, and .uml. If a model was not created in your
eclipse’s session, it does not understand how to open an actual state
chart. This is a known issue in the Papyrus plugin, and there is an easy
workaround. In a Papyrus perspective, you can see a model explorer for
your model. Double click Diagram StateMachine Diagram, which
instructs Eclipse to open this specific model in its proper Papyrus
modeling plugin.
Using UmlStateMachineModelFactory
After a UML file is in place in your project, you can import it into your
configuration by using StateMachineModelConfigurer, where
StateMachineModelFactory is associated with a model.
UmlStateMachineModelFactory is a special factory that knows how to
process a Eclipse Papyrus_generated UML structure. The source UML file can
either be given as a Spring Resource or as a normal location string.
The following example shows how to create an instance of
UmlStateMachineModelFactory:
@Configuration
@EnableStateMachine
public static class Config1 extends StateMachineConfigurerAdapter<String, String> {
@Override
public void configure(StateMachineModelConfigurer<String, String> model) throws Exception {
model
.withModel()
.factory(modelFactory());
}
@Bean
public StateMachineModelFactory<String, String> modelFactory() {
return new UmlStateMachineModelFactory("classpath:org/springframework/statemachine/uml/docs/simple-machine.uml");
}
}
As usual, Spring Statemachine works with guards and
actions, which are defined as beans. Those need to be hooked into UML
by its internal modeling structure. The following sections show
how customized bean references are defined within UML definitions.
Note that it is also possible to register particular methods manually
without defining those as beans.
If UmlStateMachineModelFactory is created as a bean, its
ResourceLoader is automatically wired to find registered actions and
guards. You can also manually define a
StateMachineComponentResolver, which is then used to find these
components. The factory also has registerAction and
registerGuard methods, which you can use to register these components. For more
about this, see Using StateMachineComponentResolver.
A UML model is relatively loose when it comes to an implementation such as
Spring Statemachine itself. Spring Statemachine leaves how to implement a lot of features and
functionalities up to the actual implementation. The following sections go
through how Spring Statemachine implements UML models based on
the Eclipse Papyrus plugin.
Using StateMachineComponentResolver
The next example shows how UmlStateMachineModelFactory is defined with
a StateMachineComponentResolver, which registers the
myAction and myGuard functions, respectively. Note that these components
are not created as beans. The following listing shows the example:
@Configuration
@EnableStateMachine
public static class Config2 extends StateMachineConfigurerAdapter<String, String> {
@Override
public void configure(StateMachineModelConfigurer<String, String> model) throws Exception {
model
.withModel()
.factory(modelFactory());
}
@Bean
public StateMachineModelFactory<String, String> modelFactory() {
UmlStateMachineModelFactory factory = new UmlStateMachineModelFactory(
"classpath:org/springframework/statemachine/uml/docs/simple-machine.uml");
factory.setStateMachineComponentResolver(stateMachineComponentResolver());
return factory;
}
@Bean
public StateMachineComponentResolver<String, String> stateMachineComponentResolver() {
DefaultStateMachineComponentResolver<String, String> resolver = new DefaultStateMachineComponentResolver<>();
resolver.registerAction("myAction", myAction());
resolver.registerGuard("myGuard", myGuard());
return resolver;
}
public Action<String, String> myAction() {
return new Action<String, String>() {
@Override
public void execute(StateContext<String, String> context) {
}
};
}
public Guard<String, String> myGuard() {
return new Guard<String, String>() {
@Override
public boolean evaluate(StateContext<String, String> context) {
return false;
}
};
}
}
Creating a Model
We start by creating an empty state machine model, shown in the following image:
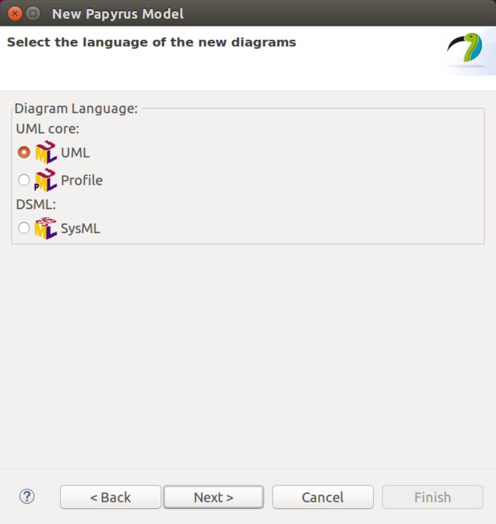
You can start by creating a new model and giving it a name, as the following image shows:
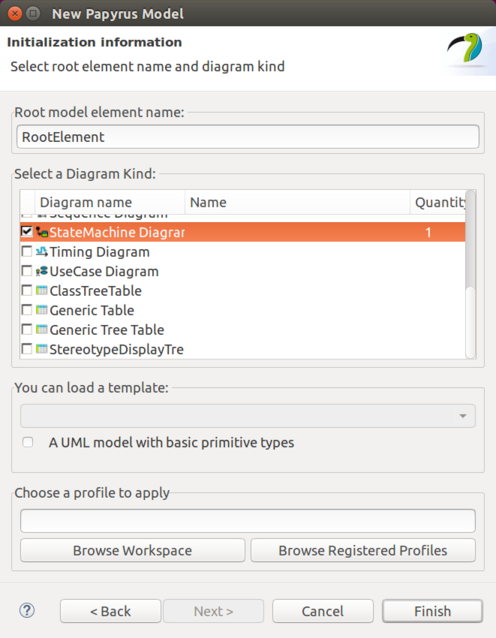
Then you need to choose StateMachine Diagram, as follows:
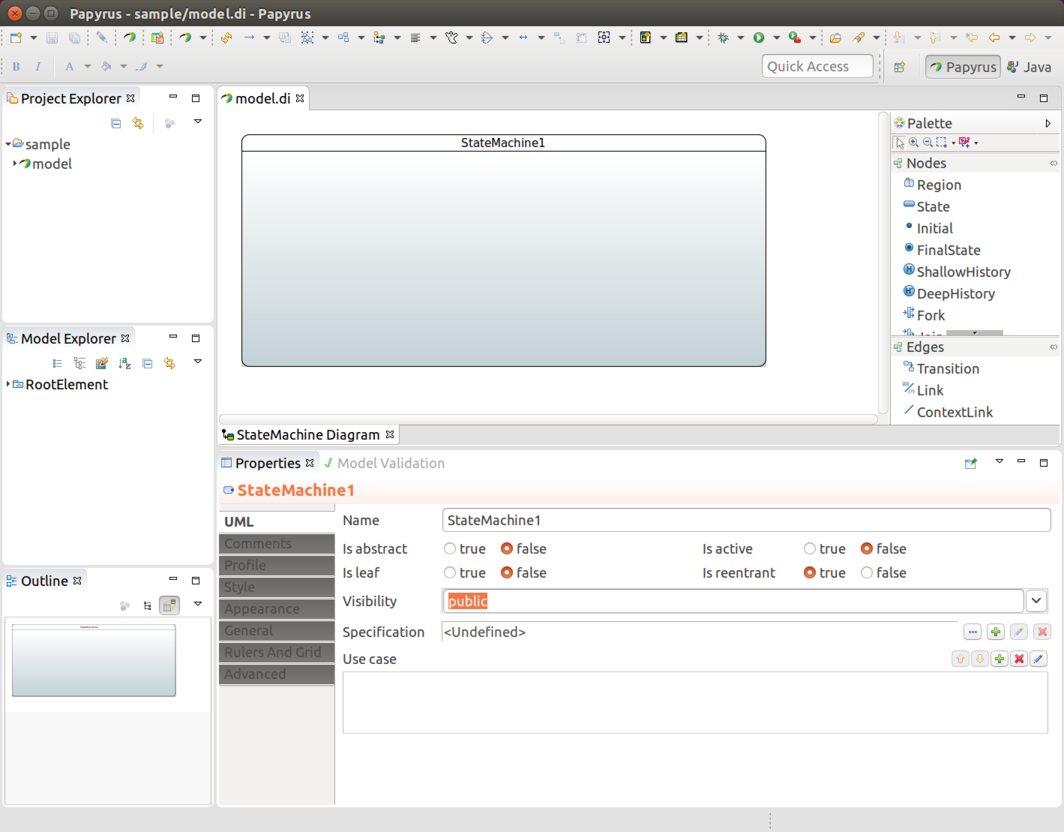
You end up with an empty state machine.
In the preceding images, you should have created a sample named model.
You should have wound up with three files: model.di,
model.notation, and model.uml. You can then used these files in any other
Eclipse instance. Further, you can import model.uml into a
Spring Statemachine.
Defining States
The state identifier comes from a component name in a diagram.
You must have an initial state in your machine, which you can do by adding
a root element and then drawing a transition to your own initial state,
as the following image shows:
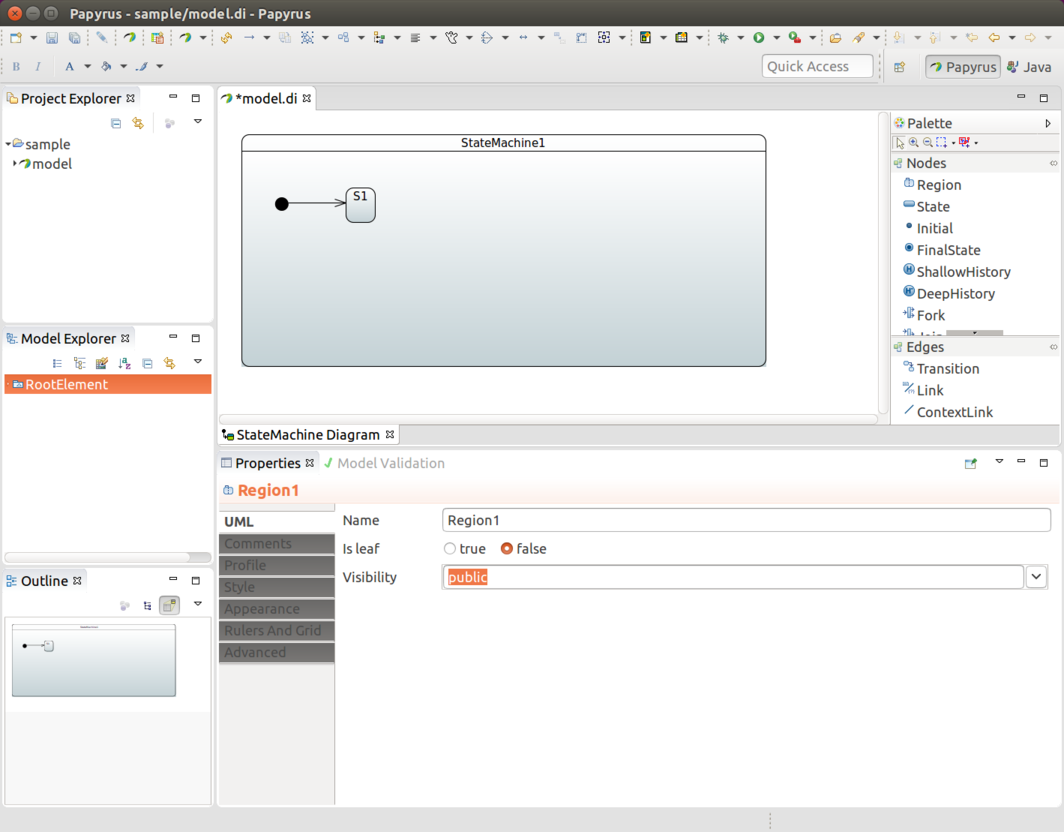
In the preceding image, we added a root element and an initial state (S1). Then we drew a transition
between those two to indicate that S1 is an initial state.
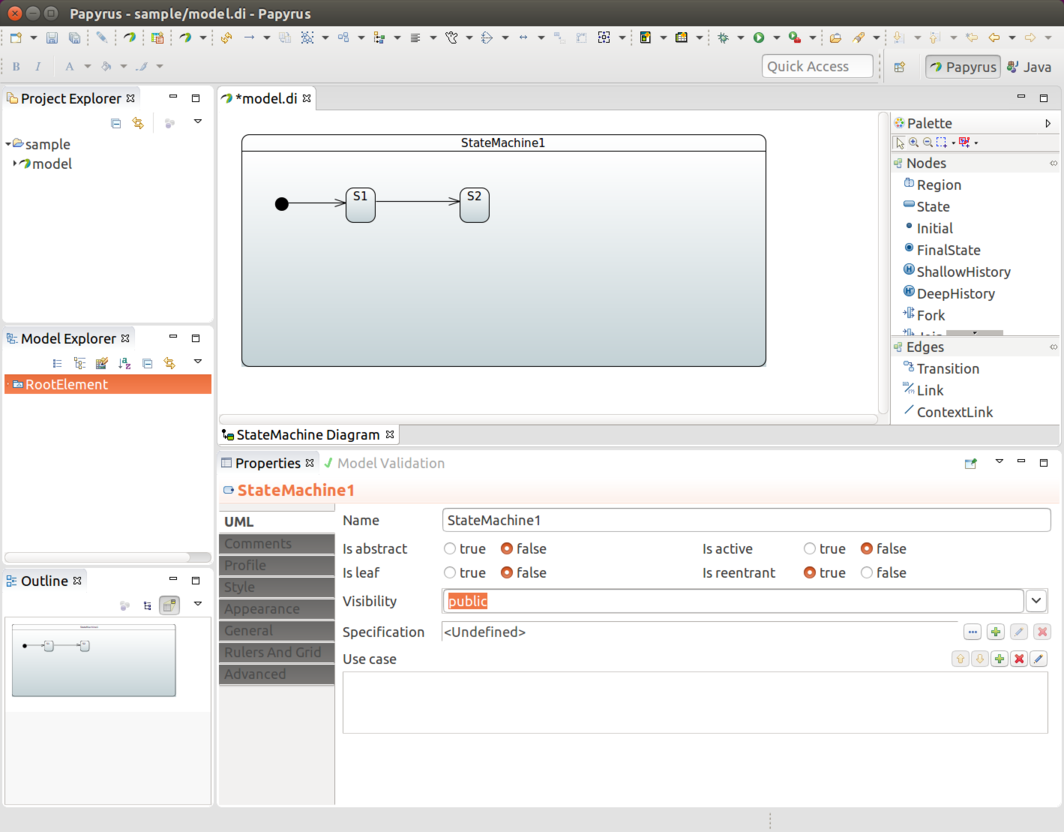
In the preceding image, we added a second state (S2) and added a transition between
S1 and S2 (indicating that we have two states).
Defining Events
To associate an event with a transition, you need to create a Signal
(E1, in this case). To do so, choose RootElement → New Child → Signal.
The following image shows the result:
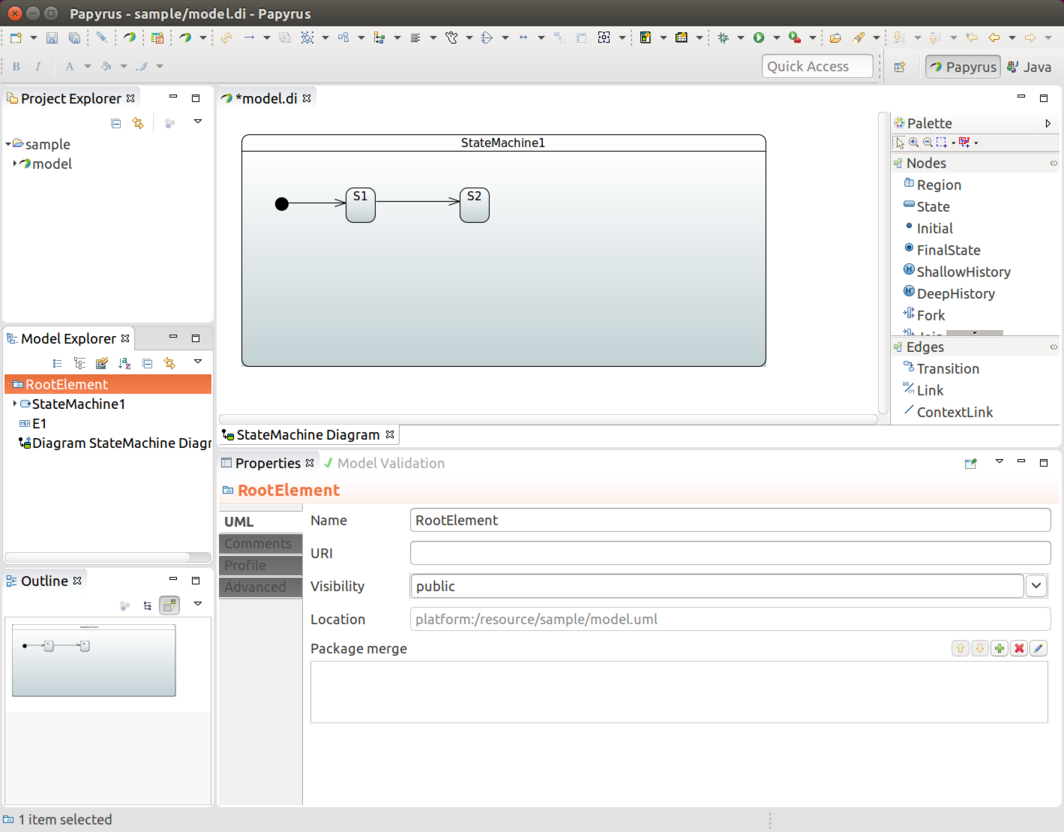
Then you need to crate a SignalEvent with the new Signal, E1.
To do so, choose RootElement → New Child → SignalEvent.
The following image shows the result:
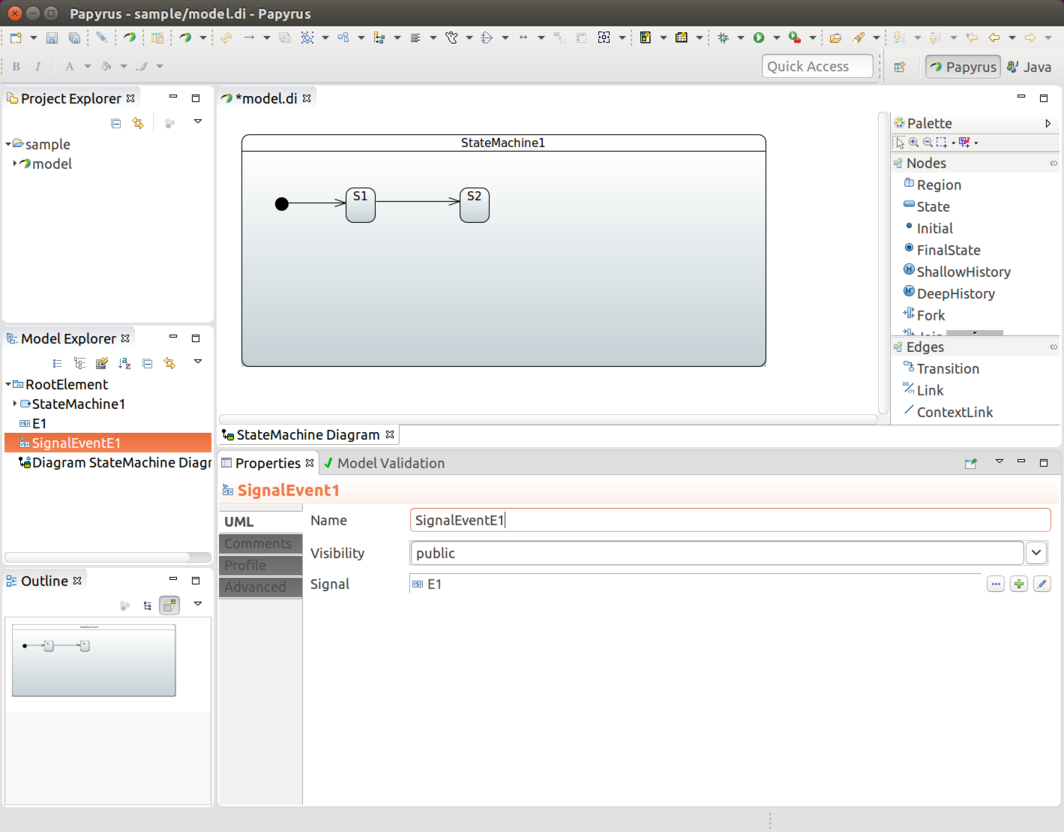
Now that you have defined a SignalEvent, you can use it to associate
a trigger with a transition. For more about that, see
Defining Transitions.
Defining Transitions
You can create a transition by drawing a transition line between the
source and target states. In the preceding images, we have states S1 and S2 and an
anonymous transition between the two. We want to associate event
E1 with that transition. We choose a transition, create a new
trigger, and define SignalEventE1 for that, as the following image shows:
This gives you something like the arrangement shown in the following image:
If you omit SignalEvent for a transition, it becomes an
anonymous transition.
Defining Timers
Transitions can also happen based on timed events. Spring Statemachine
support two types of timers, ones which fires continuously on a
background and ones which fires once with a delay when state is
entered.
To add a new TimeEvent child to Model Explorer, modify When as an
expression defined as LiteralInteger. The value of it (in milliseconds) becomes the timer.
Leave Is Relative false to make the timer fire continuously.
To define one timed based event that triggers when a state is entered, the process is exactly
same as described earlier, but leave Is Relative set to true. The following image
shows the result:

Then the user can pick one of these timed events instead of a
signal event for a particular transition.
Defining a Choice
A choice is defined by drawing one incoming transition into a
CHOICE state and drawing multiple outgoing transitions from it to target
states. The configuration model in our StateConfigurer lets you define
an if/elseif/else structure. However, with UML, we need to work with
individual Guards for outgoing transitions.
You must ensure that the guards defined for transitions do not overlap so that,
whatever happens, only one guard evaluates to TRUE at any given
time. This gives precise and predictable results for choice branch
evaluation. Also we recommend leaving one transition without a guard
so that at least one transition path is guaranteed.
The following image shows the result of making a choice with three branches:
Junction works similarly same, except that it allows multiple incoming
transitions. Thus, its behavior compared to Choice is purely
academic. The actual logic to select the outgoing transition is exactly the same.
Defining a Junction
See Defining a Choice.
Defining Entry and Exit Points
You can use EntryPoint and ExitPoint to create controlled entry and exit
with states that have sub-states. In the following state chart, events E1 and
E2 have normal state behavior by entering and exiting state
S2, where normal state behavior happens by entering initial state
S21.
Using event E3 takes the machine into the ENTRY EntryPoint, which then
leads to S22 without activating initial state S21 at any time.
Similarly the EXIT ExitPoint with event E4 controls the specific exit
into state S4, while normal exit behavior from S2 would take the
machine into state S3. While on state S22, you can choose from
events E4 and E2 to take the machine into states S3 or S4,
respectively. The following image shows the result:
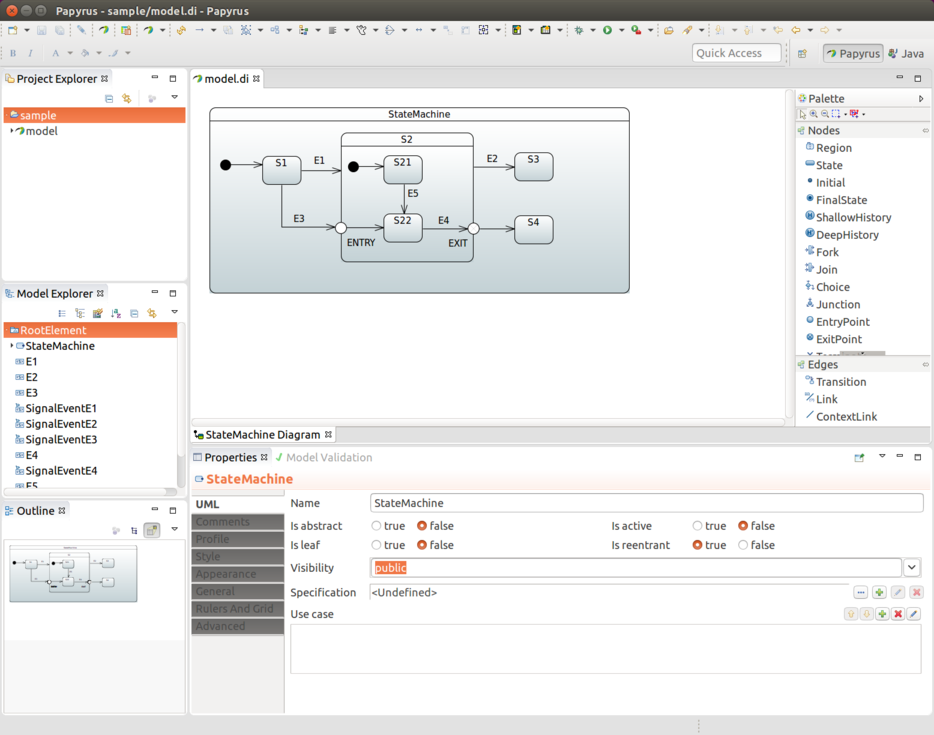
If state is defined as a sub-machine reference and you need to use entry and exit points,
you must externally define a ConnectionPointReference, with
its entry and exit reference set to point to a correct entry or exit point
within a submachine reference. Only after that, is it possible to
target a transition that correctly links from the outside to the inside of
a sub-machine reference. With ConnectionPointReference, you may need
to find these settings from Properties → Advanced → UML →
Entry/Exit. The UML specification lets you define multiple entries and exits. However,
with a state machine, only one is allowed.
Defining History States
When working with history states, three different concepts are in play.
UML defines a Deep History and a Shallow History. The Default History
State comes into play when history state is not yet known. These are
represented in following sections.
Shallow History
In the following image, Shallow History is selected and a transition is defined into it:
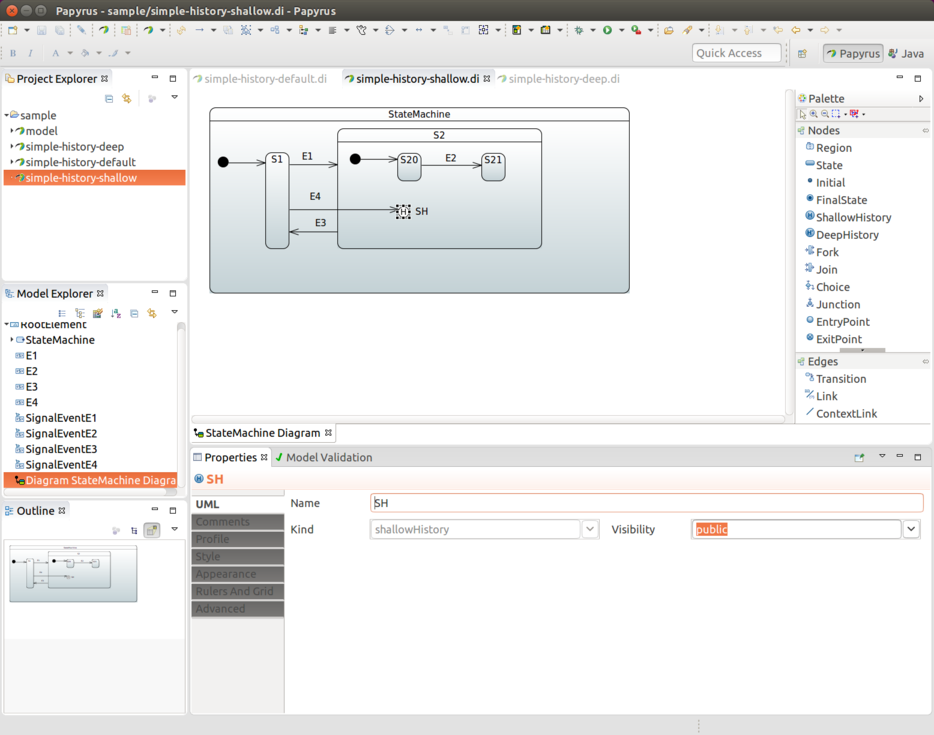
Deep History
Deep History is used for state that has other deep nested states,
thus giving a chance to save whole nested state structure.
The following image shows a definition that uses Deep History:
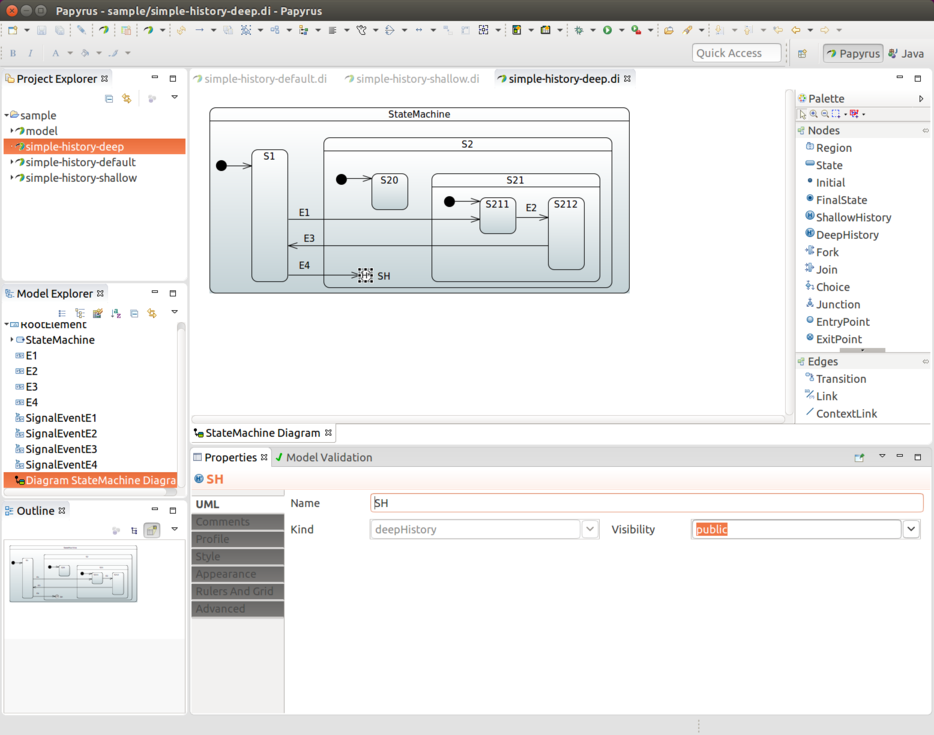
Default History
In cases where a Transition terminates on a history when
the state has not been entered before it had reached its
final state, there is an option to force
a transition to a specific substate, using the default
history mechanism. For this to happen, you must define a transition
into this default state. This is the transition from SH to
S22.
In the following image, state S22 is entered if state S2 has
never been active, as its history has never been recorded. If state
S2 has been active, then either S20 or S21 gets chosen.
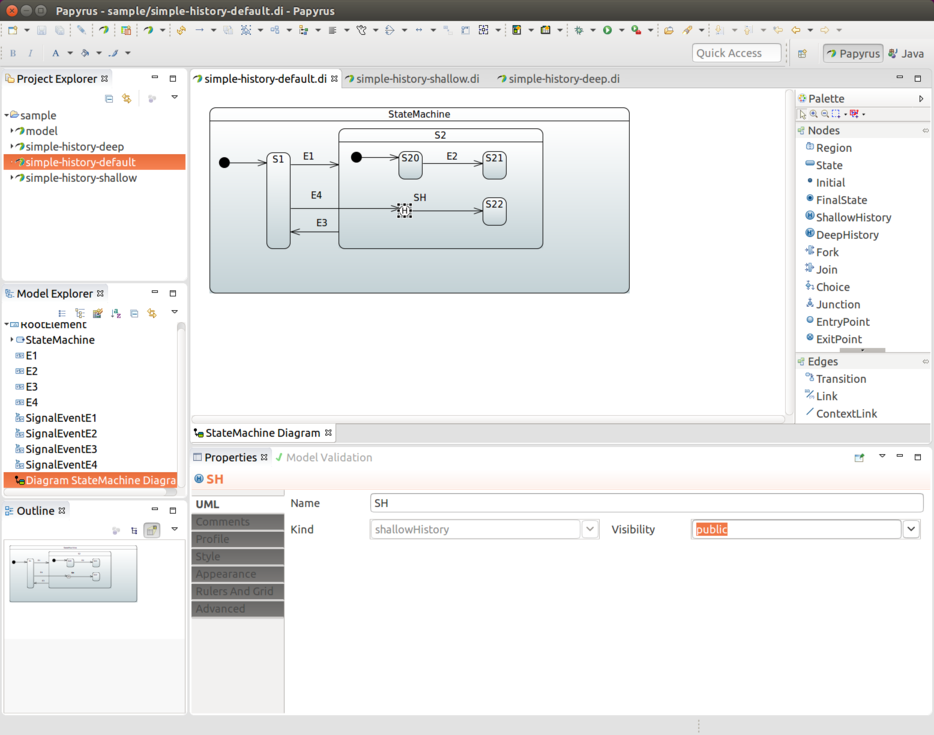
Defining Forks and Joins
Both Fork and Join are represented as bars in Papyrus. As shown
in the next image, you need to draw one outgoing transition from FORK into state
S2 to have orthogonal regions. JOIN is then the reverse, where
joined states are collected together from incoming transitions.
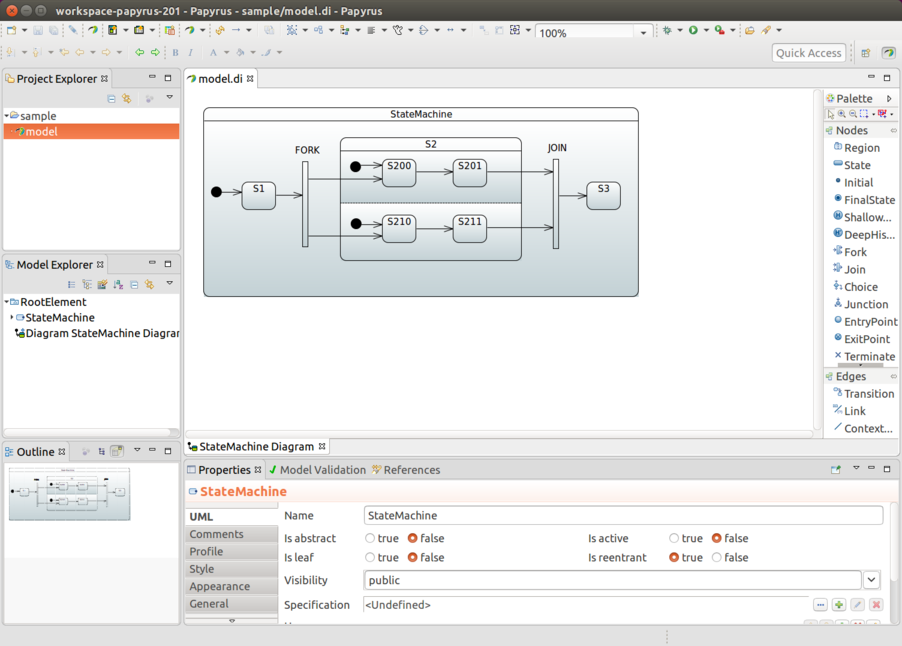
Defining Actions
You can assoiate swtate entry and exit actions by using a behavior.
For more about this, see Defining a Bean Reference.
Using an Initial Action
An initial action (as shown in Configuring Actions) is defined
in UML by adding an action in the transition that leads from the Initial State
marker into the actual state. This Action is then run when the state
machine is started.
Defining Guards
You can define a guard by first adding a Constraint and then defining
its Specification as OpaqueExpression, which works in the same way
as Defining a Bean Reference.
Defining a Bean Reference
When you need to make a bean reference in any UML effect,
action, or guard, you can do so with
FunctionBehavior or OpaqueBehavior, where the defined language needs to
be bean and the language body msut have a bean reference id.
Defining a SpEL Reference
When you need to use a SpEL expression instead of a bean reference in
any UML effect, action, or guard, you can do so by using
FunctionBehavior or OpaqueBehavior, where the defined language needs to
be spel and the language body must be a SpEL expression.
Using a Sub-Machine Reference
Normally, when you use sub-states, you draw those into the state
chart itself. The chart may become too complex and big to
follow, so we also support defining a sub-state as a state machine
reference.
To create a sub-machine reference, you must first create a new diagram and give it a name
(for example, SubStateMachine Diagram). The following image shows the menu choices to use:
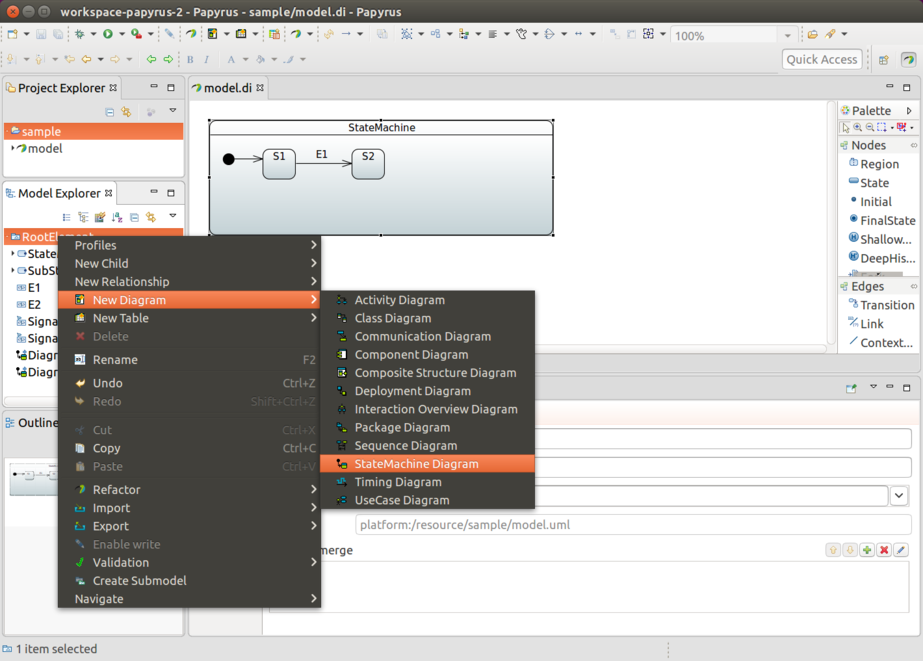
Give the new diagram the design you need.
The following image shows a simple design as an example:
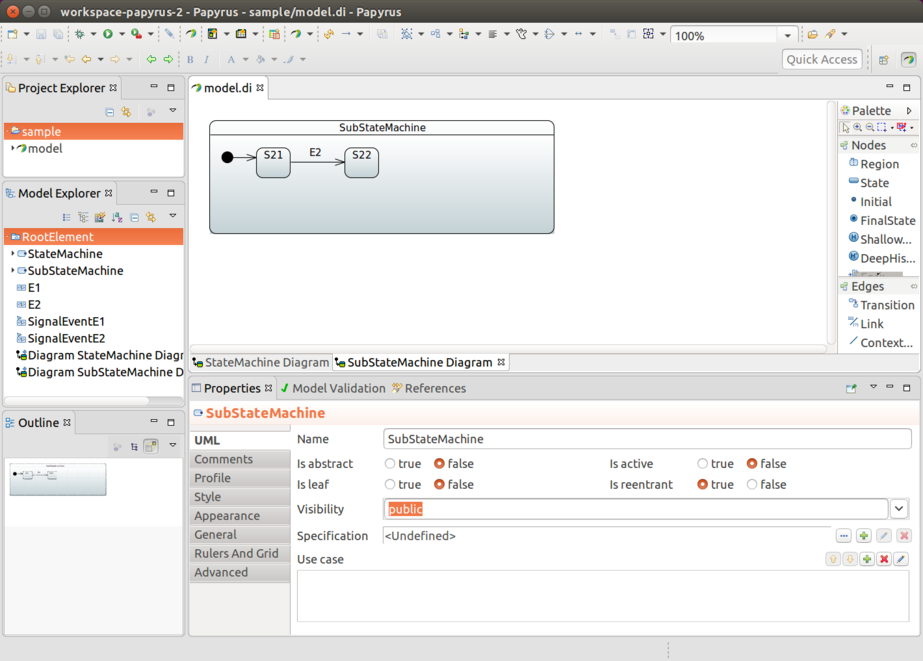
From the state you want to link (in this case,m state S2), click the
Submachine field and choose your linked machine (in our example,
SubStateMachine).
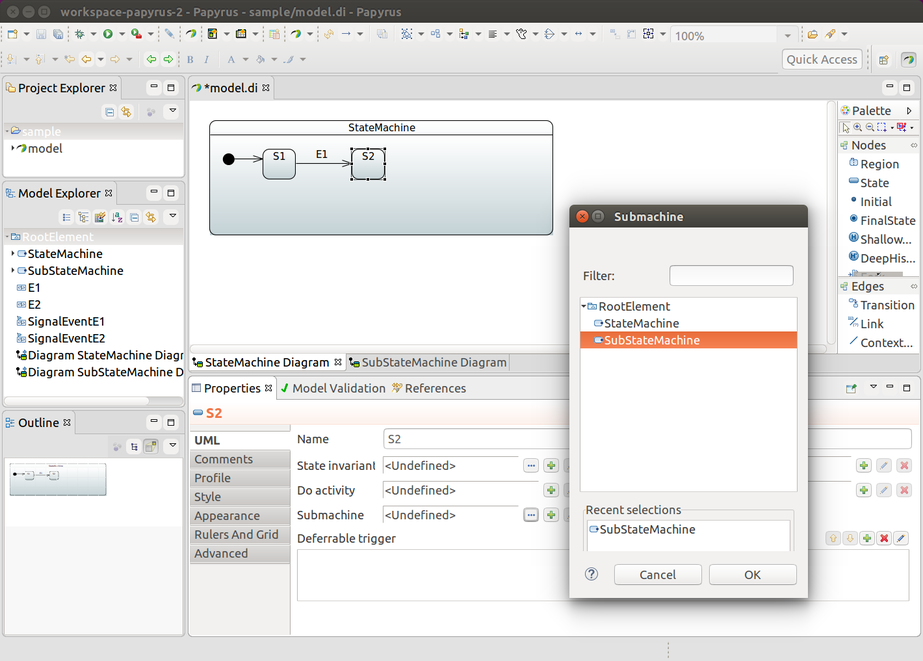
Finally, in the following image, you can see that state S2 is linked to SubStateMachine as a
sub-state.
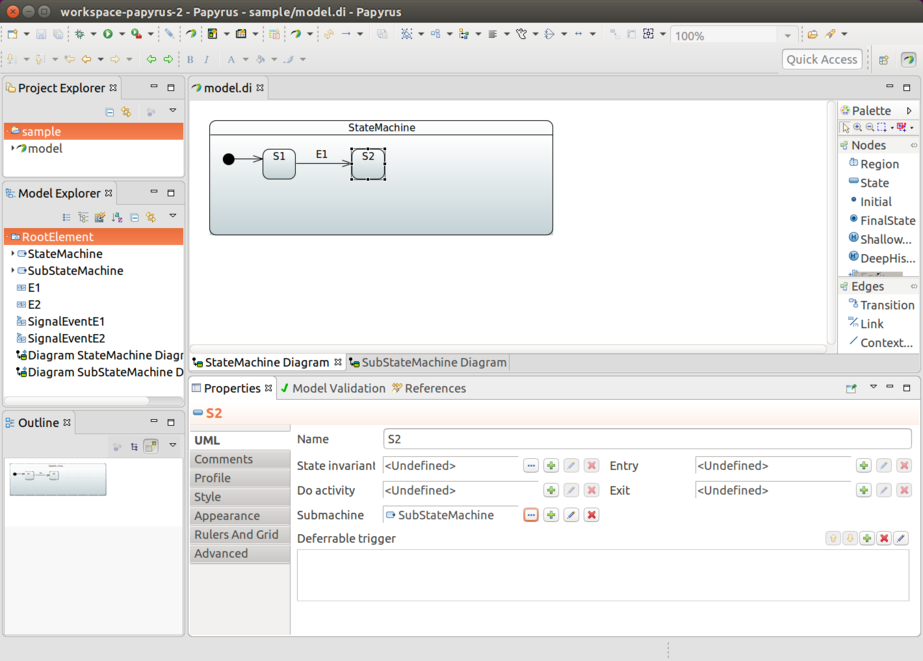
Using a Machine Import
It’s also possible to use import functionality where uml files can reference to other models.
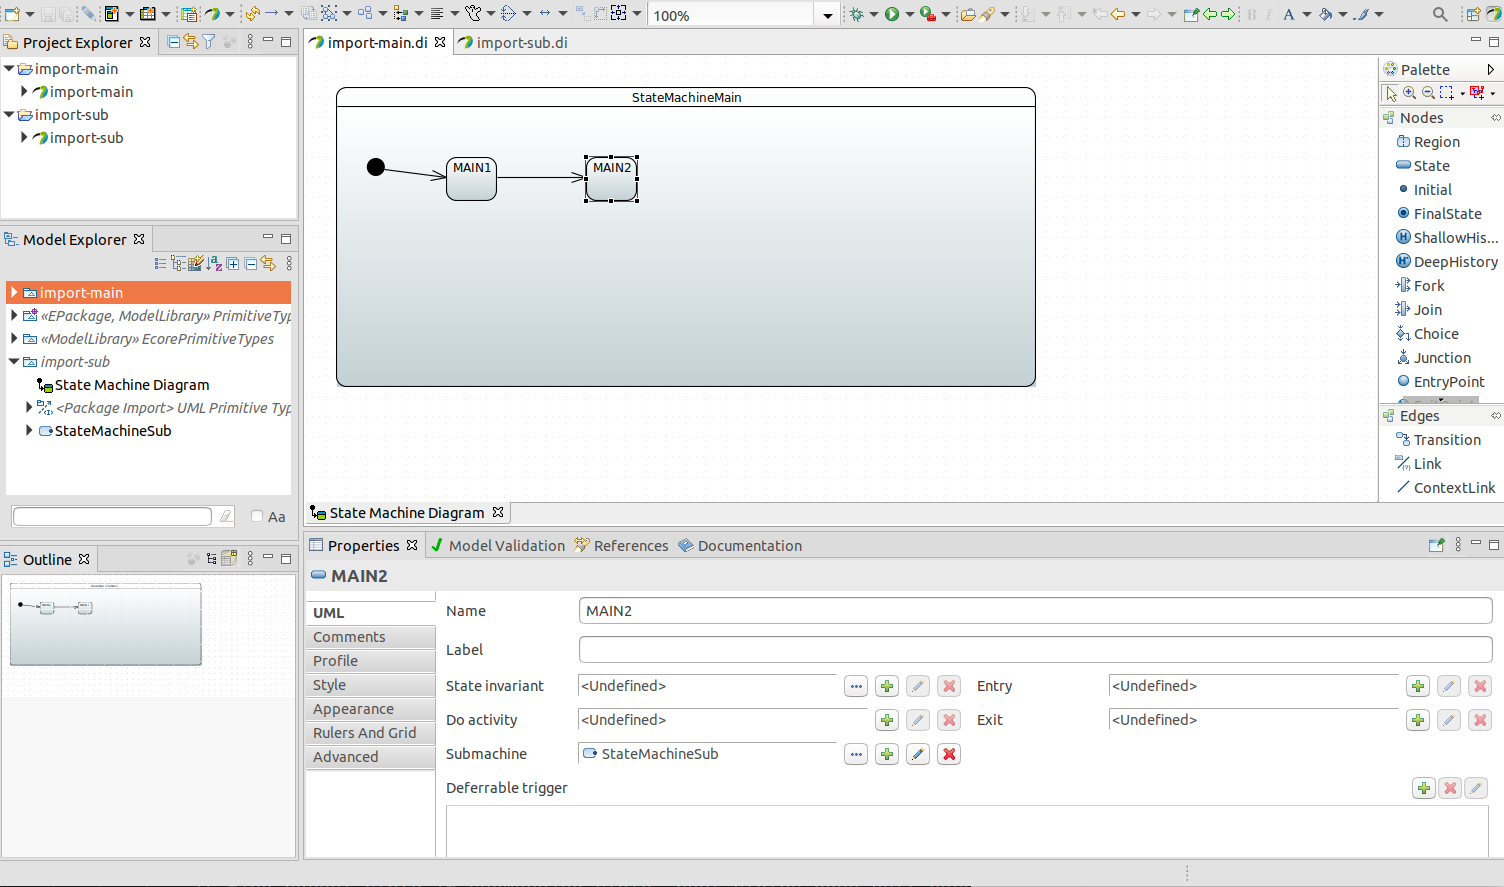
Within UmlStateMachineModelFactory it’s possible to use additional resources or locations
to define referenced model files.
@Configuration
@EnableStateMachine
public static class Config3 extends StateMachineConfigurerAdapter<String, String> {
@Override
public void configure(StateMachineModelConfigurer<String, String> model) throws Exception {
model
.withModel()
.factory(modelFactory());
}
@Bean
public StateMachineModelFactory<String, String> modelFactory() {
return new UmlStateMachineModelFactory(
"classpath:org/springframework/statemachine/uml/import-main/import-main.uml",
new String[] { "classpath:org/springframework/statemachine/uml/import-sub/import-sub.uml" });
}
}
Links between files in uml models needs to be relative as
otherwise things break when model files are copied out from a
classpath to a temporary directory so that eclipse parsing classes can
read those.
Repository Support
This section contains documentation related to using 'Spring Data
Repositories' in Spring Statemachine.
Repository Configuration
You can keep machine configuration in external
storage, from which it can be loaded on demand, instead of creating a static
configuration by using either Java configuration or UML-based configuration. This
integration works through a Spring Data Repository abstraction.
We have created a special StateMachineModelFactory implementation
called RepositoryStateMachineModelFactory. It can use the base
repository interfaces (StateRepository, TransitionRepository,
ActionRepository and GuardRepository) and base entity
interfaces (RepositoryState, RepositoryTransition,
RepositoryAction, and RepositoryGuard).
Due to way how entities and repositories work in Spring Data,
from a user perspective, read access can be fully abstracted as it is
done in RepositoryStateMachineModelFactory. There is no need to
know the actual mapped entity class with which a repository works.
Writing into a repository is always dependent on using a real
repository-specific entity class. From a machine-configuration point
of view, we do not need to know these, meaning that we do not need to know
whether the actual implementation is JPA, Redis, or anything else
that Spring Data supports. Using an actual repository-related
entity class comes into play when you manually try to write new
states or transitions into a backed repository.
Entity classes for RepositoryState and RepositoryTransition have a
machineId field, which is at your disposal and can be used to
differentiate between configurations — for example, if machines are built
via StateMachineFactory.
Actual implementations are documented in later sections.
The following images are UML-equivalent state charts of repository
configurations.
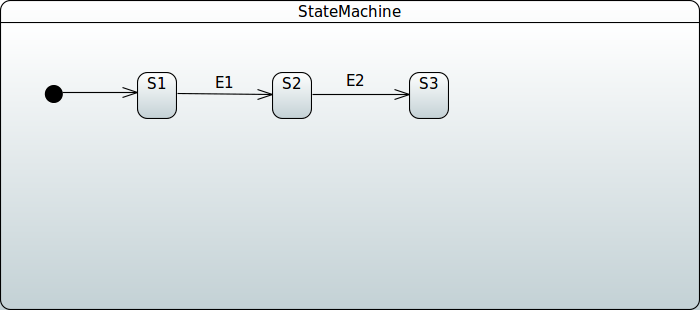 Figure 1. SimpleMachine
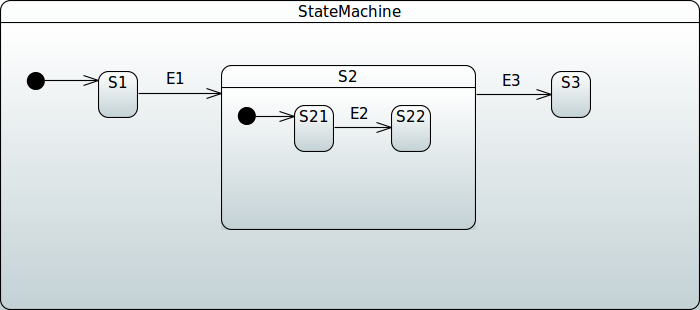 Figure 2. SimpleSubMachine
 Figure 3. ShowcaseMachine
JPA
The actual repository implementations for JPA are
JpaStateRepository, JpaTransitionRepository, JpaActionRepository,
and JpaGuardRepository, which are backed by the
entity classes JpaRepositoryState, JpaRepositoryTransition,
JpaRepositoryAction, and JpaRepositoryGuard, respectively.
Unfortunately, version '1.2.8' had to make a change in JPA’s entity
model regarding used table names. Previously, generated table names
always had a prefix of JPA_REPOSITORY_, derived from entity class
names. As this caused breaking issues with databases imposing
restrictions on database object lengths, all entity classes have
spesific definitions to force table names. For example,
JPA_REPOSITORY_STATE is now 'STATE' — and so on with other
ntity classes.
The generic way to update states and transitions manually for JPA is shown
in the following example (equivalent to the machine shown in
SimpleMachine):
@Autowired
StateRepository<JpaRepositoryState> stateRepository;
@Autowired
TransitionRepository<JpaRepositoryTransition> transitionRepository;
void addConfig() {
JpaRepositoryState stateS1 = new JpaRepositoryState("S1", true);
JpaRepositoryState stateS2 = new JpaRepositoryState("S2");
JpaRepositoryState stateS3 = new JpaRepositoryState("S3");
stateRepository.save(stateS1);
stateRepository.save(stateS2);
stateRepository.save(stateS3);
JpaRepositoryTransition transitionS1ToS2 = new JpaRepositoryTransition(stateS1, stateS2, "E1");
JpaRepositoryTransition transitionS2ToS3 = new JpaRepositoryTransition(stateS2, stateS3, "E2");
transitionRepository.save(transitionS1ToS2);
transitionRepository.save(transitionS2ToS3);
}
The following example is also equivalent to the machine shown in
SimpleSubMachine.
@Autowired
StateRepository<JpaRepositoryState> stateRepository;
@Autowired
TransitionRepository<JpaRepositoryTransition> transitionRepository;
void addConfig() {
JpaRepositoryState stateS1 = new JpaRepositoryState("S1", true);
JpaRepositoryState stateS2 = new JpaRepositoryState("S2");
JpaRepositoryState stateS3 = new JpaRepositoryState("S3");
JpaRepositoryState stateS21 = new JpaRepositoryState("S21", true);
stateS21.setParentState(stateS2);
JpaRepositoryState stateS22 = new JpaRepositoryState("S22");
stateS22.setParentState(stateS2);
stateRepository.save(stateS1);
stateRepository.save(stateS2);
stateRepository.save(stateS3);
stateRepository.save(stateS21);
stateRepository.save(stateS22);
JpaRepositoryTransition transitionS1ToS2 = new JpaRepositoryTransition(stateS1, stateS2, "E1");
JpaRepositoryTransition transitionS2ToS3 = new JpaRepositoryTransition(stateS21, stateS22, "E2");
JpaRepositoryTransition transitionS21ToS22 = new JpaRepositoryTransition(stateS2, stateS3, "E3");
transitionRepository.save(transitionS1ToS2);
transitionRepository.save(transitionS2ToS3);
transitionRepository.save(transitionS21ToS22);
}
First, you must access all repositories.
The following example shows how to do so:
@Autowired
StateRepository<JpaRepositoryState> stateRepository;
@Autowired
TransitionRepository<JpaRepositoryTransition> transitionRepository;
@Autowired
ActionRepository<JpaRepositoryAction> actionRepository;
@Autowired
GuardRepository<JpaRepositoryGuard> guardRepository;
Second, you mus create actions and guards.
The following example shows how to do so:
JpaRepositoryGuard foo0Guard = new JpaRepositoryGuard();
foo0Guard.setName("foo0Guard");
JpaRepositoryGuard foo1Guard = new JpaRepositoryGuard();
foo1Guard.setName("foo1Guard");
JpaRepositoryAction fooAction = new JpaRepositoryAction();
fooAction.setName("fooAction");
guardRepository.save(foo0Guard);
guardRepository.save(foo1Guard);
actionRepository.save(fooAction);
Third, you must create states.
The following example shows how to do so:
JpaRepositoryState stateS0 = new JpaRepositoryState("S0", true);
stateS0.setInitialAction(fooAction);
JpaRepositoryState stateS1 = new JpaRepositoryState("S1", true);
stateS1.setParentState(stateS0);
JpaRepositoryState stateS11 = new JpaRepositoryState("S11", true);
stateS11.setParentState(stateS1);
JpaRepositoryState stateS12 = new JpaRepositoryState("S12");
stateS12.setParentState(stateS1);
JpaRepositoryState stateS2 = new JpaRepositoryState("S2");
stateS2.setParentState(stateS0);
JpaRepositoryState stateS21 = new JpaRepositoryState("S21", true);
stateS21.setParentState(stateS2);
JpaRepositoryState stateS211 = new JpaRepositoryState("S211", true);
stateS211.setParentState(stateS21);
JpaRepositoryState stateS212 = new JpaRepositoryState("S212");
stateS212.setParentState(stateS21);
stateRepository.save(stateS0);
stateRepository.save(stateS1);
stateRepository.save(stateS11);
stateRepository.save(stateS12);
stateRepository.save(stateS2);
stateRepository.save(stateS21);
stateRepository.save(stateS211);
stateRepository.save(stateS212);
Fourth and finally, you must create transitions.
The following example shows how to do so:
JpaRepositoryTransition transitionS1ToS1 = new JpaRepositoryTransition(stateS1, stateS1, "A");
transitionS1ToS1.setGuard(foo1Guard);
JpaRepositoryTransition transitionS1ToS11 = new JpaRepositoryTransition(stateS1, stateS11, "B");
JpaRepositoryTransition transitionS21ToS211 = new JpaRepositoryTransition(stateS21, stateS211, "B");
JpaRepositoryTransition transitionS1ToS2 = new JpaRepositoryTransition(stateS1, stateS2, "C");
JpaRepositoryTransition transitionS1ToS0 = new JpaRepositoryTransition(stateS1, stateS0, "D");
JpaRepositoryTransition transitionS211ToS21 = new JpaRepositoryTransition(stateS211, stateS21, "D");
JpaRepositoryTransition transitionS0ToS211 = new JpaRepositoryTransition(stateS0, stateS211, "E");
JpaRepositoryTransition transitionS1ToS211 = new JpaRepositoryTransition(stateS1, stateS211, "F");
JpaRepositoryTransition transitionS2ToS21 = new JpaRepositoryTransition(stateS2, stateS21, "F");
JpaRepositoryTransition transitionS11ToS211 = new JpaRepositoryTransition(stateS11, stateS211, "G");
JpaRepositoryTransition transitionS0 = new JpaRepositoryTransition(stateS0, stateS0, "H");
transitionS0.setKind(TransitionKind.INTERNAL);
transitionS0.setGuard(foo0Guard);
transitionS0.setActions(new HashSet<>(Arrays.asList(fooAction)));
JpaRepositoryTransition transitionS1 = new JpaRepositoryTransition(stateS1, stateS1, "H");
transitionS1.setKind(TransitionKind.INTERNAL);
JpaRepositoryTransition transitionS2 = new JpaRepositoryTransition(stateS2, stateS2, "H");
transitionS2.setKind(TransitionKind.INTERNAL);
transitionS2.setGuard(foo1Guard);
transitionS2.setActions(new HashSet<>(Arrays.asList(fooAction)));
JpaRepositoryTransition transitionS11ToS12 = new JpaRepositoryTransition(stateS11, stateS12, "I");
JpaRepositoryTransition transitionS12ToS212 = new JpaRepositoryTransition(stateS12, stateS212, "I");
JpaRepositoryTransition transitionS211ToS12 = new JpaRepositoryTransition(stateS211, stateS12, "I");
JpaRepositoryTransition transitionS11 = new JpaRepositoryTransition(stateS11, stateS11, "J");
JpaRepositoryTransition transitionS2ToS1 = new JpaRepositoryTransition(stateS2, stateS1, "K");
transitionRepository.save(transitionS1ToS1);
transitionRepository.save(transitionS1ToS11);
transitionRepository.save(transitionS21ToS211);
transitionRepository.save(transitionS1ToS2);
transitionRepository.save(transitionS1ToS0);
transitionRepository.save(transitionS211ToS21);
transitionRepository.save(transitionS0ToS211);
transitionRepository.save(transitionS1ToS211);
transitionRepository.save(transitionS2ToS21);
transitionRepository.save(transitionS11ToS211);
transitionRepository.save(transitionS0);
transitionRepository.save(transitionS1);
transitionRepository.save(transitionS2);
transitionRepository.save(transitionS11ToS12);
transitionRepository.save(transitionS12ToS212);
transitionRepository.save(transitionS211ToS12);
transitionRepository.save(transitionS11);
transitionRepository.save(transitionS2ToS1);
You can find a complete example
here. This example also shows how you can
pre-populate a repository from an existing JSON file that has
definitions for entity classes.
Redis
The actual repository implementations for a Redis instance are
RedisStateRepository, RedisTransitionRepository, RedisActionRepository,
and RedisGuardRepository, which are backed by the
entity classes RedisRepositoryState, RedisRepositoryTransition,
RedisRepositoryAction, and RedisRepositoryGuard, respectively.
The next example shows the generic way to manually update states and transitions for Redis.
This is equivalent to machine shown in
SimpleMachine.
@Autowired
StateRepository<RedisRepositoryState> stateRepository;
@Autowired
TransitionRepository<RedisRepositoryTransition> transitionRepository;
void addConfig() {
RedisRepositoryState stateS1 = new RedisRepositoryState("S1", true);
RedisRepositoryState stateS2 = new RedisRepositoryState("S2");
RedisRepositoryState stateS3 = new RedisRepositoryState("S3");
stateRepository.save(stateS1);
stateRepository.save(stateS2);
stateRepository.save(stateS3);
RedisRepositoryTransition transitionS1ToS2 = new RedisRepositoryTransition(stateS1, stateS2, "E1");
RedisRepositoryTransition transitionS2ToS3 = new RedisRepositoryTransition(stateS2, stateS3, "E2");
transitionRepository.save(transitionS1ToS2);
transitionRepository.save(transitionS2ToS3);
}
The following example is equivalent to machine shown in
SimpleSubMachine:
@Autowired
StateRepository<RedisRepositoryState> stateRepository;
@Autowired
TransitionRepository<RedisRepositoryTransition> transitionRepository;
void addConfig() {
RedisRepositoryState stateS1 = new RedisRepositoryState("S1", true);
RedisRepositoryState stateS2 = new RedisRepositoryState("S2");
RedisRepositoryState stateS3 = new RedisRepositoryState("S3");
stateRepository.save(stateS1);
stateRepository.save(stateS2);
stateRepository.save(stateS3);
RedisRepositoryTransition transitionS1ToS2 = new RedisRepositoryTransition(stateS1, stateS2, "E1");
RedisRepositoryTransition transitionS2ToS3 = new RedisRepositoryTransition(stateS2, stateS3, "E2");
transitionRepository.save(transitionS1ToS2);
transitionRepository.save(transitionS2ToS3);
}
MongoDB
The actual repository implementations for a MongoDB instance are
MongoDbStateRepository, MongoDbTransitionRepository, MongoDbActionRepository,
and MongoDbGuardRepository, which are backed by the
entity classes MongoDbRepositoryState, MongoDbRepositoryTransition,
MongoDbRepositoryAction, and MongoDbRepositoryGuard, respectively.
The next example shows the generic way to manually update states and transitions for MongoDB.
This is equivalent to the machine shown in
SimpleMachine.
@Autowired
StateRepository<MongoDbRepositoryState> stateRepository;
@Autowired
TransitionRepository<MongoDbRepositoryTransition> transitionRepository;
void addConfig() {
MongoDbRepositoryState stateS1 = new MongoDbRepositoryState("S1", true);
MongoDbRepositoryState stateS2 = new MongoDbRepositoryState("S2");
MongoDbRepositoryState stateS3 = new MongoDbRepositoryState("S3");
stateRepository.save(stateS1);
stateRepository.save(stateS2);
stateRepository.save(stateS3);
MongoDbRepositoryTransition transitionS1ToS2 = new MongoDbRepositoryTransition(stateS1, stateS2, "E1");
MongoDbRepositoryTransition transitionS2ToS3 = new MongoDbRepositoryTransition(stateS2, stateS3, "E2");
transitionRepository.save(transitionS1ToS2);
transitionRepository.save(transitionS2ToS3);
}
The following example is equivalent to the machine shown in
SimpleSubMachine.
@Autowired
StateRepository<MongoDbRepositoryState> stateRepository;
@Autowired
TransitionRepository<MongoDbRepositoryTransition> transitionRepository;
void addConfig() {
MongoDbRepositoryState stateS1 = new MongoDbRepositoryState("S1", true);
MongoDbRepositoryState stateS2 = new MongoDbRepositoryState("S2");
MongoDbRepositoryState stateS3 = new MongoDbRepositoryState("S3");
MongoDbRepositoryState stateS21 = new MongoDbRepositoryState("S21", true);
stateS21.setParentState(stateS2);
MongoDbRepositoryState stateS22 = new MongoDbRepositoryState("S22");
stateS22.setParentState(stateS2);
stateRepository.save(stateS1);
stateRepository.save(stateS2);
stateRepository.save(stateS3);
stateRepository.save(stateS21);
stateRepository.save(stateS22);
MongoDbRepositoryTransition transitionS1ToS2 = new MongoDbRepositoryTransition(stateS1, stateS2, "E1");
MongoDbRepositoryTransition transitionS2ToS3 = new MongoDbRepositoryTransition(stateS21, stateS22, "E2");
MongoDbRepositoryTransition transitionS21ToS22 = new MongoDbRepositoryTransition(stateS2, stateS3, "E3");
transitionRepository.save(transitionS1ToS2);
transitionRepository.save(transitionS2ToS3);
transitionRepository.save(transitionS21ToS22);
}
Repository Persistence
Apart from storing machine configuration (as shown in
Repository Configuration), in an external repository, you canx also
persist machines into repositories.
The StateMachineRepository interface is a central access point that
interacts with machine persistence and is backed by the entity class
RepositoryStateMachine.
JPA
The actual repository implementation for JPA is
JpaStateMachineRepository, which is backed by the entity class
JpaRepositoryStateMachine.
The following example shows the generic way to persist a machine for JPA:
@Autowired
StateMachineRepository<JpaRepositoryStateMachine> stateMachineRepository;
void persist() {
JpaRepositoryStateMachine machine = new JpaRepositoryStateMachine();
machine.setMachineId("machine");
machine.setState("S1");
// raw byte[] representation of a context
machine.setStateMachineContext(new byte[] { 0 });
stateMachineRepository.save(machine);
}
Redis
The actual repository implementation for a Redis is
RedisStateMachineRepository, which is backed by the entity class
RedisRepositoryStateMachine.
The following example shows the generic way to persist a machine for Redis:
@Autowired
StateMachineRepository<RedisRepositoryStateMachine> stateMachineRepository;
void persist() {
RedisRepositoryStateMachine machine = new RedisRepositoryStateMachine();
machine.setMachineId("machine");
machine.setState("S1");
// raw byte[] representation of a context
machine.setStateMachineContext(new byte[] { 0 });
stateMachineRepository.save(machine);
}
MongoDB
The actual repository implementation for MongoDB is
MongoDbStateMachineRepository, which is backed by the entity class
MongoDbRepositoryStateMachine.
The following example shows the generic way to persist a machine for MongoDB:
@Autowired
StateMachineRepository<MongoDbRepositoryStateMachine> stateMachineRepository;
void persist() {
MongoDbRepositoryStateMachine machine = new MongoDbRepositoryStateMachine();
machine.setMachineId("machine");
machine.setState("S1");
// raw byte[] representation of a context
machine.setStateMachineContext(new byte[] { 0 });
stateMachineRepository.save(machine);
}